QuickBooks is a major accounting application that helps various business enterprises with their various operations, inventory, payroll, and many others. The accounting software is currently available in two versions: Desktop and Online. While using QuickBooks Desktop, you can customize the application as per your preferences; the online version is opted for by the majority of enterprises. The reason for that is offers the convenience of accessing the application by multiple users from different locations. Along with that, the majority of the features that the user prefers to use are available in both the Desktop and online versions.
Here, we will tell you how to your QuickBooks Desktop Data files to the online version in a step-wise manner. Along with that, we will list all the common features in both the QuickBooks Desktop and Online version. Read this blog post till the end to learn how to migrate QuickBooks Desktop to online.
Why Should I Migrate QuickBooks Desktop to Online?
Before you initiate to transfer QuickBooks Desktop to Online, you really need to determine whether the migration will be the right option for you. Various factors are there, based on which you can decide which will be a better option for the business, i.e., QuickBooks Desktop or QuickBooks Online. The first and foremost one is the size of the company. For small and medium-sized industries, migration can be a suitable option for them as it provides the amenity to access the accounting application for any location. However, for large-scale enterprises, due to extensive data and other related complexities, they should not opt for migration.
How QuickBooks Desktop is different from QuickBooks Online
Various features that one might have and the other lacks. Different major accounting features and their availability in QuickBooks Desktop and Online have been discussed below. Based on this you can decide whether to Convert QuickBooks Desktop to Online.
| Purpose of using QuickBooks | QuickBooks Online | QuickBooks Desktop |
| Company File Access and Data Management | ||
| Data Backup | Available in All Editions | All Editions |
| Restore Previous version of the Company Files | Only in the Advanced Version | All Editions |
| My Accountant | All Editions | All Editions |
| Company File Remote Access | All Editions | All Editions (Requirement of remote desktop application, terminal server setup, or hosting provider) |
| Multi-users access to company files | Only in Essentials, Plus, and Advanced version | All Editions |
| Multiple QuickBooks windows | All Editions | All Editions |
| Customer Management | ||
| Invoices and Customer bill Generation and Management | Only in Essentials, Plus, and Advanced version | All Editions |
| Billable or client Expenses | Only in the Advanced and Plus version | All Editions |
| Contractors management | All Editions | All Editions |
| Payroll/Employee Data Management | ||
| Employee Tracking | Advanced, Plus, and Essentials | All Editions |
| Payroll processing, Payroll Taxes, and T4 Filing | All Editions (including Enhanced Payroll) | All Editions (including Payroll Subscription) |
| Banking Features | ||
| Connectivity, Transaction, and Reconcile | All Editions | All Editions |
| Undo Bank reconciliation previously done | Only in QuickBooks Online Accountant | All Editions |
| Inventory Management | ||
| Tracking Inventory, Sales COGS through the FIFO method | Only in the Plus and Advanced version | All Editions |
| Inventory tracking using the average costing method | NA | All Editions |
| Inventory Reorder Points | All Editions | All Editions |
| Report Generation | ||
| Tax Category organization and Track Income and other expenses | All Editions | All Editions |
| Balance sheet reports, custom profit and loss tracking | All Editions | All Editions |
| Customer report generation | NA | NA |
| Advanced Reporting | NA | NA |
| Forecasting | Only in Advanced and Plus | Only in Premier |
Getting Ready to Convert QuickBooks Desktop to Online
Before you import QuickBooks Desktop to Online, take a look at some of the pointers you have taken before starting to Transfer QuickBooks Desktop to online:
- User need to note that they only have 60 days to export their company to migrate QuickBooks Desktop to online once they have created their QuickBooks online account.
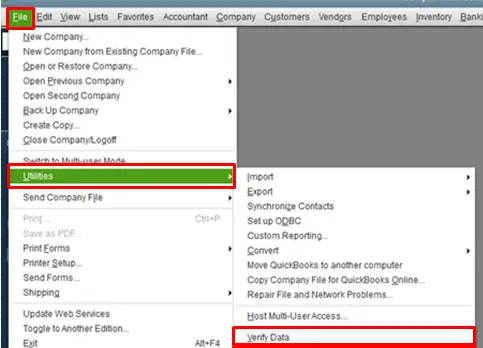
- Another thing to keep in mind is that the file size you are exporting is not too big. Maximum number of files to be exported should not be more than 75000. To check the total target to be exported, press “CTRL+1”.
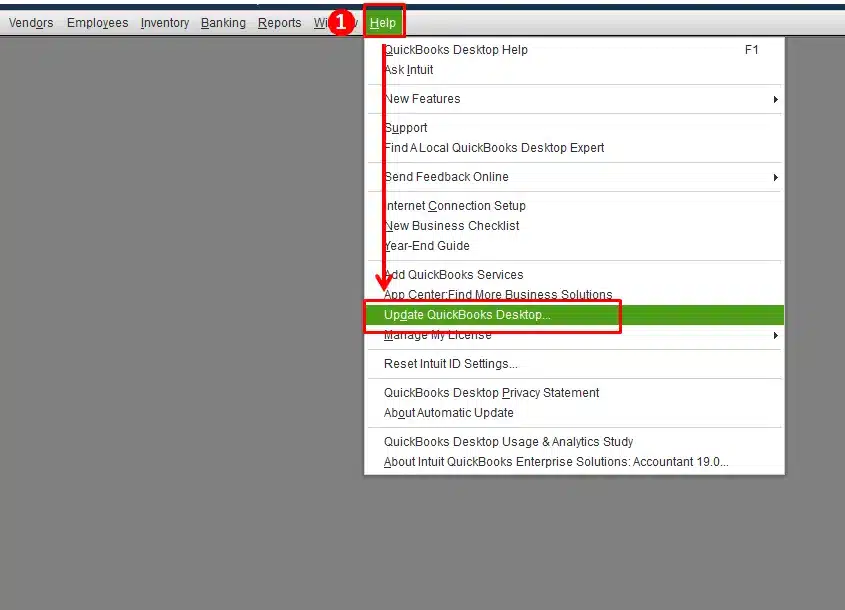
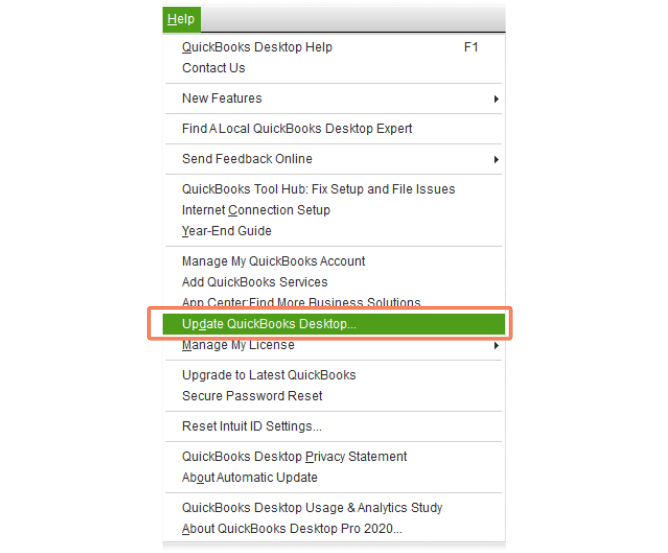
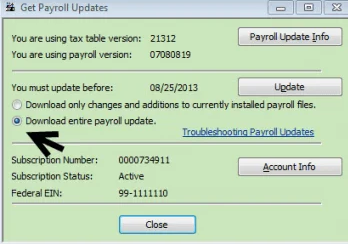
- Before you transfer files to QuickBooks online, update your software to the latest version.
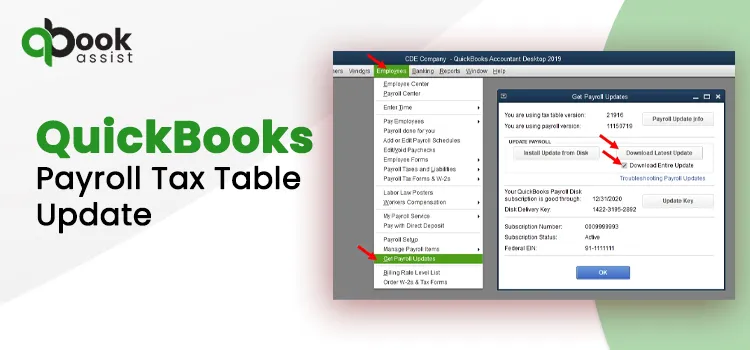
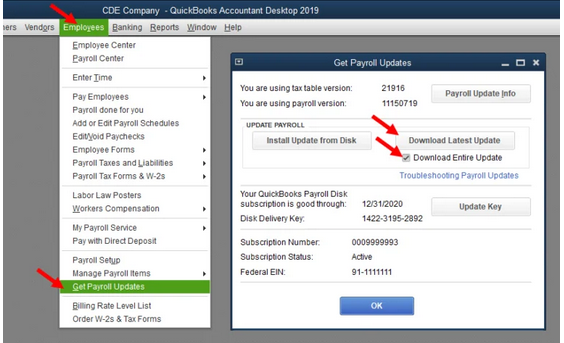
- Prior to migration, it is important to turn off some important features like payroll and others to avoid any issues.
- Another important thing is that you save your Sales Tax Liability Report.
- Export all list and reports in case you have more than 70000 targets.
Some of the measures that you need to take before you migrate QuickBooks Desktop to Online like saving Preliminary Tax report and company data backup are discussed in details below:
Create a Back-Up of QuickBooks Desktop Company File
It is consider necessary for the user to to take a backup of their company files before they import QuickBooks Desktop to Online
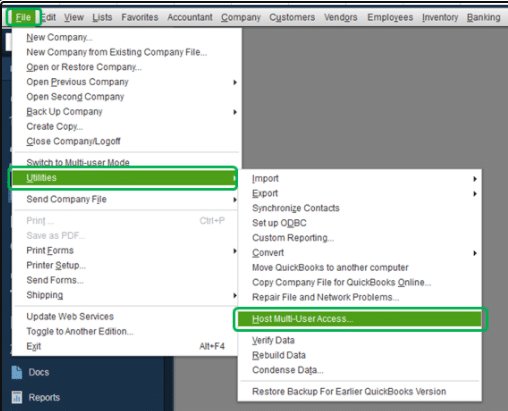
- To make a back up, first you need to switch to Single User Mode.
- Now go to the option “File” after which hit the option “Create Backup” and then “Local Backup”
- In the pop-up window. Select Local Backup” and then “Next”
- Hit the option Browse and select the folder where you wish to save your company files.
- You can also create multiple backups.
- Make a test run to ensure that the backup data file are correct
- Hit the option OK when you are ready to proceed.
- Select “Save It Now” and then Next.
Save Sales Liability Report
Follow the given steps to create a copy of Sales Tex Liability Report:
- On the homepage, click on the option Report and then Supplies and Payables
- Select Sales Tax Liability
- Select “All” from the Dates menu.
- From the print menu, select the option Save as PDF
- Browse the folder where you need to save a copy of the report.
How to Move Company Files to QuickBooks Online
Based on the version of QuickBooks you are using, you need to follow the different processes in order to transfer company files. As the majority of the users utilize the Pro, Premier, or Enterprise versions, we have listed the migration process of company files to QuickBooks online for these versions. For the user who are using an older version of QuickBooks, i.e., 2018 or older, they need to first upgrade their company files using the QuickBooks Desktop File restoration tool. After that, they can initiate the transfer process. For the user who do not currently have access to the QuickBooks tool, they need to install the trial version and then open their company files.
Move Company Files from QuickBooks Desktop Pro/Premier to QuickBooks Online
- To Export the company files, first, you need to log into the QuickBooks Desktop as admin. This will provide you the authority to access any company file in QuickBooks.
- Now, on the homepage, hit the option Company, and from the drop-down menu, select the option “Export Company Files to Company Online.”
- Afterward, you need to log in as Admin to the QuickBooks online. Then, select the option “Choose Online Company” and choose the online company that you want to replace with your company file.
- Hit the option “Continue.”
- Select “Yes” if you wish to track inventory.
- Choose “Agree” in the text field and then hit the option “Replace.”
- Finally, hit the option “Go Ahead and Replace the Data.”
Import QuickBooks Desktop Online (QB Desktop Enterprise)
The first and foremost step is that you log in as Admin first, through which you can have access to all the company files. Afterward, follow the given steps:
- Open the product information window and then press “Ctrl+B+Q”. Click OK, which will open the export window.
- Hit the option “Get Started.”
- Select “Choose Online Company,” after which you need to select the QuickBooks online company that you need to replace with the company files.
- Hit the option “Continue.”
- If you track inventory in QuickBooks Desktop, then hit “Yes” and then specify “As of date”
- Enter Agree and then select Replace.
Other things to know when you Migrate QuickBooks Desktop to Online
Users need to note that not all the information can be transferred automatically with the company files.
Information that has been converted needs to be adjusted after the migration process.
The date that is not transferred automatically needs to be added manually to the QuickBooks online account after migration.
Making it short and Simple
QuickBooks Online offers all the same features as QuickBooks Desktop, with the option to access companies from multiple files. The process of QuickBooks migration from Desktop to online is suitable for small and medium-scale enterprises. However, for the big scale industries/companies, it might not be a suitable option considering the complexities of the extensive data. Make sure to create a backup of the company before transferring them. For further information, connect with us through the number given below.
Frequently Ask Questions (FAQs)
What does not convert during QuickBooks migration Desktop to online?
Not every piece of information on the company can be converted or transferred when you import QuickBooks desktop to online. For this, you need to re-add them manually in the system.
How do I add a company file to QuickBooks Online?
Go to the option “Company” and then select “Export company files.”You can directly “Ctrl+B+Q” in order to open the export window in QuickBooks Desktop Enterprise.
Why would I use an Online conversion tool to migrate companies to QuickBooks Online?
Users with an older version of QuickBooks (2018 or older) need to upgrade the company files, for which online conversion tools can be a better option. Only after that, can they transfer company files from desktop to online.
Why Should I Switch to QuickBooks Online?
Users with QuickBooks online have the option to access the company from anywhere using QuickBooks online version.
What is QuickBooks Migration Tool?
It is a feature or application available with QuickBooks online to move files to various accounting systems.