QuickBooks Error 15225 — The Complete Fix Guide for Payroll and Desktop Update Failures
Payroll runs on Friday. It is Wednesday afternoon. You open QuickBooks, click Get Updates, and watch the progress bar move — and then stop. Dead. Replaced by a message that makes absolutely no sense at the worst possible moment:
“QuickBooks cannot verify the digital signature of the update file.”
Error 15225.
Your payroll update failed. Your software is now sitting on an outdated version. And you have no idea what a digital signature is or why QuickBooks suddenly cannot verify one.
This is the reality of QuickBooks Error 15225 — and the reason it feels so disproportionately stressful is that it ambushes you during what should be the most routine task in the world. You clicked update. That is all you did. And now you are stuck.
At QBookAssist, we handle this error regularly for small business owners, accountants, and bookkeepers across the US. We have seen it on brand-new Windows 11 machines. We have seen it on systems that were updating perfectly fine last week. We have seen it block payroll the day before payday — which, as anyone running a business knows, is about the worst timing an error can have.
The good news is this — QuickBooks Error 15225 has a clear set of causes and a clear set of fixes. Eleven of them. And the vast majority of users are back running their updates within thirty minutes.
This guide covers every fix, every cause, and a few solutions that no other guide on the internet currently covers — including a specific section for Windows 11 users where the standard guidance no longer applies.
What QuickBooks Error 15225 Actually Is
Let us clear this up before anything else, because understanding it changes how you approach fixing it.
Every time QuickBooks downloads an update — whether that is a payroll tax table update or a QuickBooks Desktop software update — it does not just install the file immediately. It first checks whether that file is genuine. It does this by reading the file’s digital signature — essentially a cryptographic stamp that Intuit places on every legitimate update file to prove it has not been tampered with.
QuickBooks Error 15225 means that verification failed.
QuickBooks downloaded the file. Then it tried to read the digital signature. And something prevented it from confirming that the signature was valid — an expired security certificate, a blocked internet connection, incorrect SSL settings, a firewall that intercepted the download, or a corrupted QuickBooks installation that cannot read signatures correctly.
The result is that QuickBooks refuses to install the file. Not because the file is bad — in almost every case, it is perfectly fine. But because QuickBooks cannot confirm it is genuine, it stops as a security measure.
Your financial data is completely safe. This error has nothing to do with your company file. It is entirely about the update process — and that is a solvable problem.
The Full QuickBooks 15XXX Error Family
This is something most guides skip — and it matters because you may be seeing a variation of this error rather than exactly 15225.
QuickBooks Error 15225 belongs to the 15XXX error family — a group of errors that all share the same root cause: QuickBooks failed to verify the digital signature of a downloaded file.
| Error Code | When It Appears |
| Error 15214 | During QuickBooks Desktop update |
| Error 15215 | During payroll update download |
| Error 15217 | When verifying update file signature |
| Error 15218 | SSL connection to Intuit server fails |
| Error 15221 | Security certificate validation error |
| Error 15222 | Payroll update signature mismatch |
| Error 15223 | Download interrupted during verification |
| Error 15224 | Windows security certificate expired |
| Error 15225 | Digital signature verification failed |
| Error 15226 | Update file cannot be authenticated |
If you are seeing any of these errors — not just 15225 — every solution in this guide applies to your situation. They are the same problem expressed slightly differently depending on exactly where in the verification process the failure occurs.
From our team: When a client calls with any 15XXX error, we follow the same diagnostic process regardless of the exact number. The underlying cause — digital signature verification failure — is always the same. The specific number just tells us roughly where in the update process things broke down.
Which Solution Is Right for Your Specific Situation?
Do not start at Solution 1 and blindly work through everything. Use this table to find the right starting point for your exact situation — it will save you significant time.
| Your Exact Situation | Best Starting Point |
| Error appeared during payroll update | Solution 1 — Digital Signature |
| Error appeared during QB software update | Solution 2 — Trusted Website |
| Your system clock shows wrong date or time | Solution 3 — Date and Time |
| QuickBooks was not opened as Administrator | Solution 4 — Run as Admin |
| Windows has not been updated recently | Solution 5 — Windows Update |
| You use Internet Explorer or Edge for QB | Solution 6 — SSL Settings |
| Antivirus was recently installed or updated | Solution 7 — Firewall |
| Standard solutions have not worked | Solution 8 — Safe Mode |
| Multiple QB errors appearing together | Solution 9 — Diagnostic Tool |
| Payroll subscription recently expired or changed | Solution 10 — Subscription |
| Everything else tried with no result | Solution 11 — Clean Reinstall |
| You are on Windows 11 specifically | Windows 11 Section |
What Actually Causes QuickBooks Error 15225?
Seven causes account for essentially every case of this error. Knowing which one applies to you makes the fix significantly faster.
1. Expired or Unregistered Digital Signature Certificate
This is the most common cause. The QBW32.exe file — the main QuickBooks executable — contains a digital signature issued by Intuit. When this certificate expires, is not properly registered in Windows, or gets corrupted during a system update, QuickBooks loses its ability to verify downloaded files.
The error message says it all: QuickBooks is trying to check the signature, finding something wrong with the certificate, and stopping the installation as a precaution.
2. Internet Explorer or Browser Misconfiguration
QuickBooks Desktop historically uses Internet Explorer’s settings to manage internet connections — even if you never open Internet Explorer yourself. If IE’s security zones, trusted site settings, or SSL configurations are incorrect, QuickBooks cannot establish a secure connection to Intuit’s update servers to verify the digital signature.
This is also why the fix involves adding Intuit to Internet Explorer’s trusted sites — even on computers that use Chrome or Edge as their main browser.
3. Expired Windows Security Certificate
Windows maintains its own library of trusted root certificates — essentially a list of organizations it considers trustworthy. When Microsoft’s own security certificates expire or fall out of date on your system, Windows loses the ability to validate Intuit’s digital signature even if the QuickBooks certificate itself is perfectly fine.
Running Windows Update typically resolves this — because Microsoft ships updated root certificates through Windows Update.
4. Firewall or Antivirus Blocking the Update
Windows Defender Firewall, third-party antivirus programs, and corporate security software sometimes intercept QuickBooks’ connection to Intuit’s update servers. The download appears to proceed — but the security software inspects the traffic and either blocks the file or strips the digital signature in the process.
The result is a file that arrives at QuickBooks without a verifiable signature — and Error 15225 immediately follows
5. Damaged QuickBooks Installation
A QuickBooks installation that was partially uninstalled, interrupted during a previous update, or corrupted by a system crash sometimes loses the components it needs to read and verify digital signatures. The update process starts normally, reaches the verification step, and fails because the verification mechanism itself is broken.
6. Incorrect System Date and Time
This one catches people completely off guard — and it is almost never mentioned in other guides.
Digital signature certificates contain expiry dates. When Windows checks a certificate, it compares the certificate’s expiry date against the current system time. If your system clock is wrong — even by a few hours in the wrong timezone — Windows may conclude that a perfectly valid certificate has expired. And QuickBooks fails verification immediately.
We have seen this exact situation cause QuickBooks payroll update error 15225 on otherwise healthy systems. Two minutes to fix the clock — error disappears completely.
7. Inactive or Expired Payroll Subscription
When your QuickBooks payroll subscription has lapsed — or when Intuit’s servers cannot verify that your subscription is active — the payroll update process sometimes throws Error 15225 instead of a more descriptive subscription error.
Before spending an hour on technical fixes, it is always worth checking whether your subscription is current and properly linked to your QuickBooks account
How to Identify QuickBooks Error 15225 in Your System Logs
Most guides tell you what the error message says. Nobody tells you how to find more specific information about what actually failed.
QBWin.log is QuickBooks’ own diagnostic log — and it contains detailed information about exactly where the verification failed.
Press Windows + R and type %appdata%\Intuit\QuickBooks. Press Enter. Look for a file called QBWin.log. Open it with Notepad and press Ctrl+F. Search for 15225 or LVL_ERROR. The log entries near that point will show the exact component or certificate that failed verification.
This is particularly useful when you have tried Solutions 1 through 6 with no result — the log tells you specifically what is still broken.
How to Fix QuickBooks Error 15225
One thing before you start. Back up your company file if you have not done so recently. Go to File > Back Up Company > Create Local Backup. The error does not affect your data — but a backup before any troubleshooting session is always the right call.
1. Install the QuickBooks Digital Signature Certificate
This is the most direct fix for QuickBooks error code 15225 — because it addresses the root cause head-on rather than working around it.
Close all open company files and close QuickBooks completely. Open File Explorer and navigate to C:\Program Files (x86)\Intuit\QuickBooks — or C:\Program Files\Intuit\QuickBooks if you are on a 32-bit system. Find the file called QBW32.exe.
Right-click QBW32.exe and select Properties. Go to the Digital Signature tab. You should see Intuit Inc. listed in the signature list. Select it and click Details. In the Digital Signature Details window, click View Certificate. In the Certificate window, click Install Certificate.
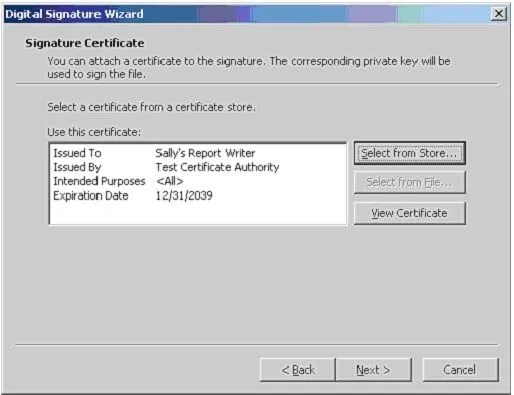
The Certificate Import Wizard opens. Click Next through the prompts until you reach Finish. Click Finish. The certificate is now installed and registered in Windows.
Restart your computer. Open QuickBooks and try running the update again- if you are unsure how to run the update correctly, follow our complete guide on how to update QuickBooks Desktop step by step.
From our team: This single solution resolves the majority of Error 15225 cases we handle. When the digital signature certificate is properly installed and registered, Windows can verify it immediately — and the update runs without issue. Try this first before anything else.
2. Add Intuit as a Trusted Website
QuickBooks uses Internet Explorer’s security zone settings to determine which websites it can connect to securely. When Intuit’s servers are not in the trusted zone, Internet Explorer’s security settings can block the digital signature verification connection — triggering QuickBooks update error 15225.
Open Internet Explorer — press Windows, type Internet Explorer, and open it. If you cannot find Internet Explorer on Windows 11, use the Run box (Windows + R) and type iexplore. Click the Gear icon in the top right and select Internet Options.
Go to the Security tab and click Trusted Sites, then click the Sites button.
In the box, type https://www.intuit.com and click Add. Then typehttps://www.intuit.ca and click Add (this matters for Canadian QuickBooks users). Also add https://payroll.intuit.com and https://qbo.intuit.com.
Make sure the checkbox for Require server verification (https:) for all sites in this zone is checked. Click Close, then Apply, then OK.
Restart Internet Explorer completely. Then reopen QuickBooks and attempt the update.
Important: Even if you use Chrome or Edge as your daily browser — you still need to do this in Internet Explorer. QuickBooks Desktop uses Internet Explorer’s settings internally for its update connections regardless of what browser you use.
3. Fix Your System Date and Time
This is the fastest fix in the entire guide — and the most overlooked one.
Right-click the clock in your Windows taskbar and select Adjust Date/Time. Make sure the date, time, and timezone are all completely accurate. If Set Time Automatically is enabled but the time is still wrong, toggle it off and on again to force a sync with Microsoft’s time servers.
After correcting the time, restart QuickBooks and try the update immediately.
Why this matters: digital signature certificates have expiry dates. When Windows compares a certificate’s expiry against your system clock — and your clock is wrong — it concludes the certificate has expired even when it has not. QuickBooks error 15225 appears instantly as a result. Fixing a two-minute clock problem has resolved this error for more of our clients than we can count.
4. Run QuickBooks Update as Administrator
Close QuickBooks completely. Find the QuickBooks icon on your Desktop or in your Start menu. Right-click it and select Run as Administrator. Click Yes when Windows asks for permission.
With QuickBooks open as Administrator, go to Help > Update QuickBooks Desktop. Click the Update Now tab and then Get Updates.
Running as Administrator gives QuickBooks the elevated permissions it needs to install certificates, modify system settings, and complete the update verification process without being blocked by Windows User Account Control.
This is particularly effective on shared workstations where QuickBooks was installed by one user but is being updated by another — a situation that creates permission conflicts almost every time.
5. Update Windows and Security Certificates
Microsoft ships updated root certificates and security patches through Windows Update. When your system is behind on updates, it may be missing the specific certificate update that allows Windows to validate Intuit’s digital signature — causing QuickBooks payroll update error 15225 even when everything else is configured correctly.
Click the Windows Start button and type Settings. Go to Update and Security > Windows Update on Windows 10, or Windows Update directly on Windows 11. Click Check for Updates. Install every available update — including optional ones. Restart when prompted.
After the restart, open QuickBooks and try the update again before moving to the next solution.
On Windows 11 specifically, also check Optional Updates under Windows Update. Microsoft sometimes ships root certificate updates as optional rather than automatic — and those are precisely the updates that fix digital signature verification failures.
6. Fix SSL and TLS Settings and Clear SSL State
SSL and TLS are the security protocols that QuickBooks uses to establish encrypted connections with Intuit’s servers during the update process. If these settings are misconfigured — or if the SSL state cache contains corrupted session data — the digital signature verification cannot complete.
Step 1 — Clear the SSL State:
Open Internet Explorer. Click the Gear icon and select Internet Options. Go to the Content tab and click Clear SSL State. Click OK. Close and reopen Internet Explorer.
Step 2 — Configure SSL and TLS Settings:
In Internet Explorer, go to Gear icon > Internet Options > Advanced tab. Scroll down to the Security section. Make sure these are checked:
- Use SSL 3.0
- Use TLS 1.0
- Use TLS 1.1
- Use TLS 1.2
Make sure these are unchecked:
- Do not save encrypted pages to disk
Click Apply and OK. Restart your computer and try the QuickBooks update again.
From our team: The SSL state cache is something almost nobody thinks to clear — but it stores session information from previous connection attempts. When a previous failed update attempt left corrupted session data in the cache, every subsequent update attempt fails at the same point. Clearing it gives QuickBooks a completely fresh connection to Intuit’s servers.
7. Configure Windows Firewall for QuickBooks
When your Windows Firewall or antivirus software is blocking QuickBooks from connecting to Intuit’s update servers, the digital signature verification fails mid-process and QuickBooks error code 15225 appears.
Step 1 — Test by temporarily disabling the firewall:
Go to Settings > Update and Security > Windows Security > Firewall and Network Protection. Turn off Microsoft Defender Firewall for Domain, Private, and Public Networks. Try the QuickBooks update immediately.
If the update succeeds — your firewall was the culprit. Turn the firewall back on and move to Step 2 to create proper exceptions instead of leaving it disabled.
If the update still fails — your firewall is not the cause. Skip to Solution 8.
Step 2 — Create QuickBooks Firewall Exceptions:
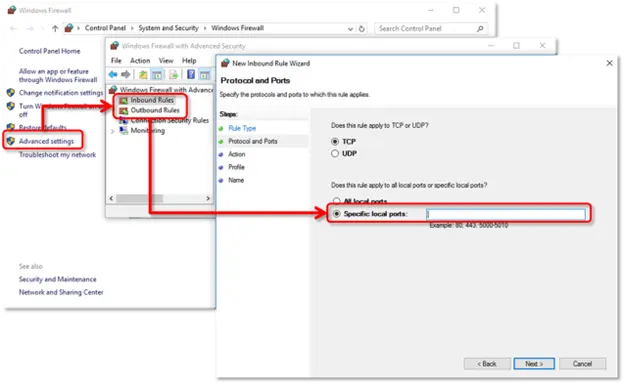
Press the Windows Start button and type Windows Firewall. Select Windows Defender Firewall with Advanced Security. Click Inbound Rules on the left, then New Rule on the right.
Select Program and click Next. Select This Program Path and browse to find each of these QuickBooks executable files — create a separate exception for each:
| Executable File | Location |
| QBW32.exe | C:\Program Files\Intuit\QuickBooks YEAR |
| QBDBMgrN.exe | C:\Program Files\Intuit\QuickBooks YEAR |
| QBUpdate.exe | C:\Program Files\Common Files\Intuit\QuickBooks\QBUpdate |
| QBCFMonitorService.exe | C:\Program Files\Common Files\Intuit\QuickBooks |
| QBLaunch.exe | C:\Program Files\Common Files\Intuit\QuickBooks |
| IntuitSyncManager.exe | C:\Program Files\Common Files\Intuit\Sync |
For each file: click Next, select Allow the Connection, click Next, check all three profile boxes (Domain, Private, Public), click Next, give the rule a name like QBFirewallException-QBW32, and click Finish.
Repeat the same process for Outbound Rules.
Restart your computer and try the QuickBooks update again.
QBookAssist tip: If you use a third-party antivirus — Norton, McAfee, Avast, Bitdefender, or others — also add QuickBooks as a trusted application inside the antivirus software itself. Windows Firewall exceptions alone are not enough when a third-party security program has its own blocking rules.
8. Update QuickBooks in Windows Safe Mode
Safe Mode with Networking starts Windows with only essential services running — no third-party antivirus, no startup programs, no background applications that could interfere with the update process.
Restart your computer. As it starts up, press F8 repeatedly until you see the Advanced Boot Options menu. Select Safe Mode with Networking. On Windows 10 and 11, hold the Shift key while clicking Restart, then go to Troubleshoot > Advanced Options > Startup Settings > Restart, and select option 5 for Safe Mode with Networking.
Once in Safe Mode, open QuickBooks and go to Help > Update QuickBooks Desktop. Click the Update Now tab, then Get Updates. Let the update complete fully.
Restart your computer normally after the update finishes. Open QuickBooks and confirm the update installed correctly.
This solution works specifically because Safe Mode removes every program that could be intercepting, blocking, or corrupting the update download before QuickBooks can verify its digital signature.
9. Run the QuickBooks Install Diagnostic Tool
When the QuickBooks installation itself is damaged — corrupted components, missing registry entries, broken certificate handling — no amount of internet settings fixes will resolve the error. The Install Diagnostic Tool addresses this directly.

Close QuickBooks. Download the latest version of the QuickBooks Tool Hub from Intuit’s official website. Open the downloaded file and install it following the on-screen steps. Once installed, open the QuickBooks Tool Hub and go to the Installation Issues tab. Click QuickBooks Install Diagnostic Tool and let it run completely — this takes up to twenty minutes.
When it finishes, restart your computer. Open QuickBooks and try the update again.
The Install Diagnostic Tool automatically repairs damaged .NET Framework components, MSXML, and Visual C++ libraries — all of which can affect QuickBooks’ ability to verify digital signatures during the update process.
10. Verify Your Active Payroll Subscription
This solution is almost never mentioned elsewhere — but it resolves QuickBooks payroll update error 15225 in cases where the actual underlying problem is a subscription issue rather than a technical one.
Open QuickBooks and go to Employees > My Payroll Service > Account/Billing Information. Sign in with your Intuit account credentials. Verify that:
- Your payroll subscription shows as Active
- The subscription is linked to the correct QuickBooks account
- Your payment method is current and not expired
- The Employer Identification Number (EIN) on the account matches your company file
If your subscription has lapsed — even by one day — Intuit’s servers may reject the payroll update request and throw Error 15225 rather than a clear subscription expiry message.
Renew the subscription if needed. Then return to QuickBooks, go to Help > Update QuickBooks Desktop, and run the update again.
11. Clean Reinstall of QuickBooks Desktop
If all ten solutions above have not resolved QuickBooks Desktop error 15225, a clean reinstall is the definitive fix. The most important thing about this process is doing it completely — a half-done reinstall simply recreates the same problem.
Step 1 — Note your license details: Before uninstalling anything, find your QuickBooks license number and product number. These are on your original packaging, your purchase confirmation email, or inside QuickBooks at Help > About QuickBooks.
Step 2 — Uninstall QuickBooks: Go to Control Panel > Programs and Features. Find QuickBooks in the list, select it, and click Uninstall/Change > Remove > Next. Let the uninstall complete and restart your computer.
Step 3 — Rename old QuickBooks folders: Open File Explorer and show hidden files (View > Hidden Items). Navigate to each of these locations and rename the QuickBooks folder by adding OLD at the end:
- C:\Program Files\Intuit\QuickBooks (year)
- C:\Program Files (x86)\Intuit\QuickBooks (year)
- C:\ProgramData\Intuit\QuickBooks (year)
- C:\Users[username]\AppData\Local\Intuit\QuickBooks (year)
Step 4 — Run the QuickBooks Clean Install Tool: Open the QuickBooks Tool Hub and go to Installation Issues. Click Clean Install Tool. This removes every residual QuickBooks file and registry entry the standard uninstall left behind. Do not skip this step — it is the difference between a clean reinstall and another broken one.
Step 5 — Download and reinstall: Download a fresh QuickBooks Desktop installer directly from Intuit’s official website. Right-click the installer and select Run as Administrator. Follow the installation steps, enter your license and product numbers, and let the installation complete.
Step 6 — Update immediately after installing: After reinstalling, go to Help > Update QuickBooks Desktop and run updates before doing anything else. This confirms the installation is clean and the update process is working correctly.
QuickBooks Error 15225 on Windows 11
This section exists because the standard guidance for this error has a significant problem on Windows 11 — and nobody else is talking about it.
Internet Explorer is deprecated on Windows 11. Microsoft officially retired IE in June 2022. On many Windows 11 machines, Internet Explorer either does not exist or does not function properly. But QuickBooks Desktop still depends on IE’s settings for its update connections.
This creates a confusing situation: the standard fix says “open Internet Explorer and add Intuit to trusted sites” — but on Windows 11, Internet Explorer may not open at all.
Here is how to handle it on Windows 11:
Option 1 — Access Internet Options without opening Internet Explorer: Press Windows + R and type inetcpl.cpl. Press Enter. The Internet Properties window opens directly — without needing to open Internet Explorer itself. Add Intuit to trusted sites exactly as described in Solution 2.
Option 2 — Configure Microsoft Edge for compatibility: Open Microsoft Edge. Click the three-dot menu in the top right and go to Settings > Default Browser. Under Internet Explorer compatibility, turn on Allow sites to be reloaded in Internet Explorer mode. Then add www.intuit.com and payroll.intuit.com to the IE Mode site list.
Option 3 — Update root certificates through Windows Update: On Windows 11, go to Settings > Windows Update > Advanced Options > Optional Updates. Check for any certificate or security updates that are not automatically applied. Install them. This often resolves digital signature verification failures on Windows 11 without requiring any IE configuration at all.
Windows 11 users — run Solutions 3, 4, and 5 first before touching any IE settings. The date/time fix, Run as Administrator, and Windows Update resolve Error 15225 on Windows 11 in the majority of cases — without the Internet Explorer complexity.
How to Prevent QuickBooks Error 15225 From Coming Back
Ten minutes now versus another payroll disruption six months from now.
Keep QuickBooks updated regularly. The longer you wait between updates, the more likely it is that the digital signature certificate has changed and your system needs to re-verify it from scratch. Monthly updates are smoother than quarterly ones.
Add Intuit to trusted sites permanently. Do not just add it as a troubleshooting step — keep it in your trusted sites list permanently. This prevents the trusted site issue from ever causing this error again.
Set Windows Update to automatic. Root certificate updates come through Windows Update. A system behind on updates is a system waiting for a certificate error to happen.
Add QuickBooks to your antivirus whitelist now. Do not wait until the next error appears. Open your antivirus or security software today and add QuickBooks Desktop as a trusted application. This prevents every category of update interference.
Verify your payroll subscription renewal date. Put it in your calendar three weeks before expiry. Renewing before it lapses means the subscription is always active when you run payroll updates — which eliminates an entire category of Error 15225 triggers.
Keep your system clock accurate. Enable automatic time synchronization in Windows settings. This takes thirty seconds and permanently eliminates the system clock as a possible cause of digital signature errors.
If you are still running an older version of QuickBooks Desktop, consider upgrading to [QuickBooks Desktop 2025] — the latest version has improved update handling that reduces Error 15225 frequency significantly.
Conclusion
QuickBooks Error 15225 stops you at the worst possible moment — right when you are trying to keep your software current and your payroll running. It is frustrating precisely because you were doing the right thing.
But the cause is always the same: something prevented QuickBooks from verifying the digital signature of its update file. Fix that something — whether it is the certificate registration, the trusted site settings, the system clock, the SSL configuration, the firewall, or the installation itself — and the error disappears.
Start with Solution 1 — install the digital signature certificate. If that does not resolve it, work through Solutions 2, 3, and 4 in order. Most users are done within fifteen minutes. The later solutions exist for cases where something deeper needs attention.
And if you get through all eleven solutions with the error still there — that is when you stop fighting it alone.
Call QBookAssist at +1-866-408-0544 . Our team will find exactly what is preventing your QuickBooks update from completing and fix it fast — so your payroll runs on time and your software stays current.
Frequently Asked Questions (FAQ’s)
Q1: What is QuickBooks Error 15225 and why does it happen?
Ans. QuickBooks Error 15225 is a digital signature verification failure that occurs when QuickBooks cannot confirm that a downloaded update file is genuine. It happens when the digital signature certificate is expired or unregistered, when Internet Explorer security settings block Intuit’s servers, when the system clock is incorrect, or when a firewall or antivirus intercepts the download before verification completes.
Q2: Does QuickBooks Error 15225 affect my company file or financial data?
Ans. No — not at all. Error 15225 is entirely about the update process. Your company file, transactions, payroll records, and financial data are completely unaffected. The error prevents QuickBooks from installing an update, but it does not touch anything in your company file.
Q3: What is the fastest fix for QuickBooks Error 15225?
Ans. Check your system date and time first — it takes two minutes and resolves the error in a surprising number of cases. If the clock is correct, install the digital signature certificate from QBW32.exe as described in Solution 1. These two steps together resolve the majority of Error 15225 cases our team handles.
Q4: Why does QuickBooks Error 15225 appear during payroll updates specifically?
Ans. Payroll updates require a verified connection to Intuit’s servers to authenticate your subscription and download tax table updates. This verification process relies on digital signatures and SSL connections — the same mechanisms that Error 15225 disrupts. The payroll update process is more sensitive to certificate and connection issues than a standard software update, which is why payroll is often where this error first appears.
Q5: What is the difference between QuickBooks Error 15225 and other 15XXX errors like 15222 or 15226?
Ans. All 15XXX errors share the same root cause — digital signature verification failure during a QuickBooks update. The specific error number indicates roughly where in the verification process the failure occurred. Error 15222 typically appears during payroll specifically, while 15225 and 15226 are more general update failures. Every solution in this guide applies to all 15XXX errors — not just 15225.
Q6: I am on Windows 11 and cannot find Internet Explorer. What do I do?
Ans. On Windows 11, use the Run box (Windows + R) and type inetcpl.cpl to access Internet Options directly without opening Internet Explorer. Alternatively, run Solutions 3, 4, and 5 first — the date/time fix, Run as Administrator, and Windows Update resolve Error 15225 on Windows 11 in most cases without requiring any Internet Explorer configuration.
Q7: Can QuickBooks Error 15225 come back after I fix it?
Ans. Yes — if the underlying cause was not permanently addressed. The most common reasons for recurrence are a trusted site setting that gets reset after a browser update, a Windows Update that changes certificate settings, or an antivirus update that adds new blocking rules for QuickBooks processes. Following the prevention steps in this guide — particularly permanent trusted site configuration, automatic Windows Updates, and antivirus whitelisting — significantly reduces the chance of seeing this error again.
Q8: When should I call a professional instead of continuing to troubleshoot?
Ans. Call a specialist if the error persists after all eleven solutions, if your payroll is blocked with payday approaching, if the error returned immediately after a clean reinstall, or if the error is appearing on multiple workstations simultaneously. A network-wide or persistent Error 15225 almost always involves a system or network-level configuration that needs professional assessment rather than continued self-troubleshooting.

Recent Posts
QuickBooks Payroll: Service, Setup, Pricing and Support Guide
Read MoreQuickBooks Error Support: Get Instant Help Via Live Chat or Call
Read MoreQuickBooks Error 3371 Explained: Common Causes and 7 Effective Fixes
Read MoreHow to Contact QuickBooks Customer Service and Talk to a Live Expert
Read MoreHow to Update QuickBooks Company File Without Losing Data?
Read More