The QuickBooks for Online Payroll is the latest addition to the accounting application. It helps small-scale business enterprises manage their payroll along with other important data related to the employees. The Online QuickBooks payroll is perfectly functional for small-scale businesses where the minimum number of employees exceeds 150. You can also integrate QuickBooks with other application. Hence, you can easily manage your employees salary and other data. However, before opting for any accounting solution, you need to know all the features and benefits. So the detail based on this applications has been furnished in this Article. Now you can easily decide weather this application is right for you or not.
So, here we are going to list various features and benefits of using QuickBooks online payroll. Thus, read this blog post till the end to get all available information on QuickBooks Online Payroll.
Brief Information About Online QuickBooks for Payroll
The new QuickBooks for Online Payroll is an automated and definitive accounting application introduced in the market for small-scale and medium enterprises. The application is available in integration with QuickBooks online, through which you can easily manage different operations of the business under one roof and also swiftly make payments to your employees and contractors in the form of paper checks and direct deposits.
Based on the preferences of your business and the different solutions for which you need a payroll system, QuickBooks Online Payroll offers three versions which are:
- Online Payroll Core
- Elite
- Premium
The QuickBooks Online Payroll offers a variety of features like E-File, automatic payroll, same-day direct deposit, and many other tax-related features. Along with that, small businesses and others that have just started can rely on QuickBooks Online Payroll and can utilize various other employee-related services like HR support, Worker Comp, 401(K) Plans, and Health Benefits, along with 24/7 expert assistance. All these features make QuickBooks the best payroll management system in the market, not excluding the fact of affordable QuickBooks payroll costs.
Various Features of QuickBooks for Payroll Online
Various features available in QuickBooks Online Payroll for the small and medium business includes:
Same-Day Direct Deposit: Through direct deposit, the net pay can get transferred and withdrawn on the same day from the bank account by the employees. This is beneficial for the employees as they receive instant payroll and for the employer as they can run the payroll whenever they want. Through Direct Deposit, employees can hold onto their cash for a longer time and make the transaction as per their convenience.
Tax Penalty Protection
The program is available exclusively for the user with the Elite Plan. Under this program, QuickBooks for Payroll Online offers full assistance to resolve any tax penalty, whether its federal, state, or local payroll, if it has been made while using QuickBooks Online Payroll services. In case of any penalty applicable to the user, QuickBooks will cover with reimbursement along with interest. To opt for this Tax penalty protection scheme, follow these three simple steps:
- Fill out the authorization forms through which Intuit can enroll with different authorities and process tax payments to them on your behalf.
- Once you have filled out the form, the expert will review your payroll setup, and once they have checked that everything is correct, they will activate your Tax Protection Program.
- Now, you are secured with assurance from QuickBooks from any Tax penalty. In case you receive any notice regarding the same, you need to send a copy of the tax notice within 15 days from the date printed on it.
Auto Tax, Forms, and Payroll
The QuickBooks Online Payroll management system is totally focused on automating the working of your enterprise. For this, it provides the amenity through which you can set the Online Payroll to automatically run your payroll, calculate taxes, and pay them on your behalf.
Time Tracking
One major aspect while generating payroll for the employees is the Timesheet. Users can utilize these features by downloading the QuickBooks workforces through which they can track, submit, and approve time even when there is no connectivity. Through this app, you can manage multiple timesheets at once. Through QuickBooks Time, you can easily create schedules for your employees based on their shifts, jobs, and tasks.
What are the Benefits of using Online QuickBooks for Payroll System?
Along with the features mentioned above, there are many benefits of using the QuickBooks Enhanced Payroll system online, some of which are listed below:
24/7 Customer Support and Expert Assistance
Not only various accounting solutions provided by Intuit are top-notch, but also their customer assistance and expert support. Users in case they are facing any issues with their payroll software, then connect with the experts who are available 24/7. Along with that, they can get assistance in their payroll setup. Along with that, an HR advisor is already installed in an online payroll system to which users can ask any query regarding payroll and workforce management.
Easily Manage W-2 and 1099 Forms
For any business enterprise, the payroll is not only limited to the regular employees but also to various freelancers and contractors. While for regular employees, the W-2 form is available in each and every accounting or payroll system. However, not many accounting software provide the option to manage the 1099 contractors forms. QuickBooks is one among the few through which you can handle both regular employees and contractors and even pay them by hours, days, weeks, or any preferred time frame.
No additional QuickBooks Payroll Cost on the Same Day Direct Deposit:
The QuickBooks Enhanced Payroll system offers direct deposit at no additional cost. Also, based on the employee’s preference, you can also issue them a check.
Easy Assign Jobs as Billable and Non-Billable
This is one of the major Job Costing features through which you can easily assign jobs and classify them whether they are related to the client project or not. This can be beneficial while showing the client the resources that the business is spending on its projects.
Easily Pick an Affordable 401(K) Plans
The 401 (K) plans are retirement saving plans sponsored by the employer. Along with significant tax to help employees save up for their future. Through QuickBooks Online, the cheapest payroll service, employers can pick the 401(K) plan that is right and affordable for them. Through this, you can also set the contribution towards or let the employees decide it by themselves.
Not only retirement saving plans for employees but other benefits. For example, medical, dental, and other insurance packages can be selected through QuickBooks Online Payroll.
QuickBooks Online Payroll Pricing
The major query after getting all the details about any product is the pricing. Pricing for QuickBooks Online payroll varies depending on the products that you have chosen for your business. Different variations in which QuickBooks Online Payroll is available based on the prices are Core, Premium, and Elite. Pricing might vary from time to time. However, the monthly price range of the products falls between USD 30-100. The payroll core can be available at a price of USD 30/month, and the Elite version can go up to USD 100 per month.
Why Should I Subscribe for QuickBooks Online Payroll
After getting enough information, the question that comes to mind is how all these attributes are beneficial for my business. Considering the affordable QuickBooks Online Payroll pricing in comparison with other accounting solutions. To explain that, we have listed some pointers that you need to look at:
- User can easily integrate QuickBooks Enhanced Payroll with accounting solutions.
- With this feature they can manage all the financial operations related to their business at a single platform, i.e., QuickBooks.
- QuickBooks offers expert support 24/7 to whom you can connect anytime regarding any issues like Payroll setup and many others.
- Another advantage of the online payroll system of QuickBooks includes automatic payroll runs and tax payments.
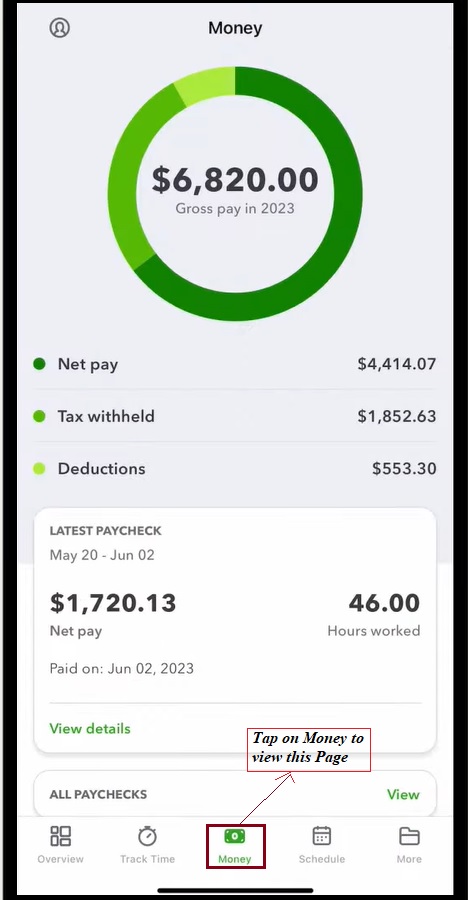
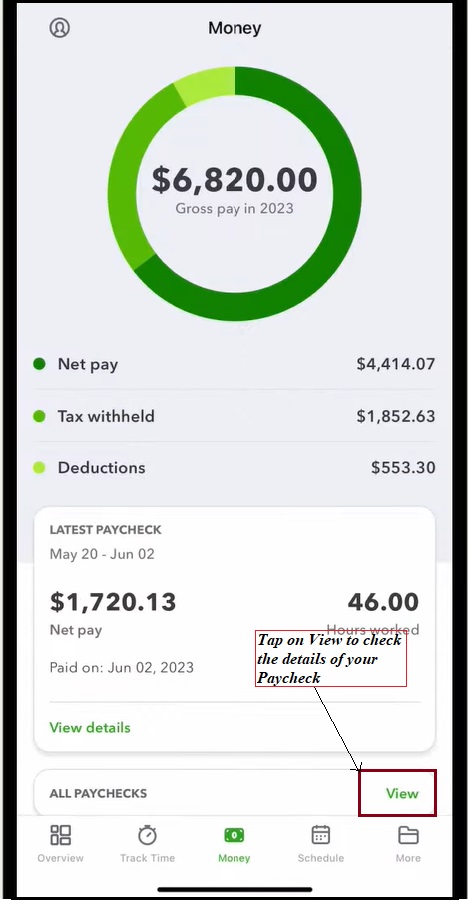
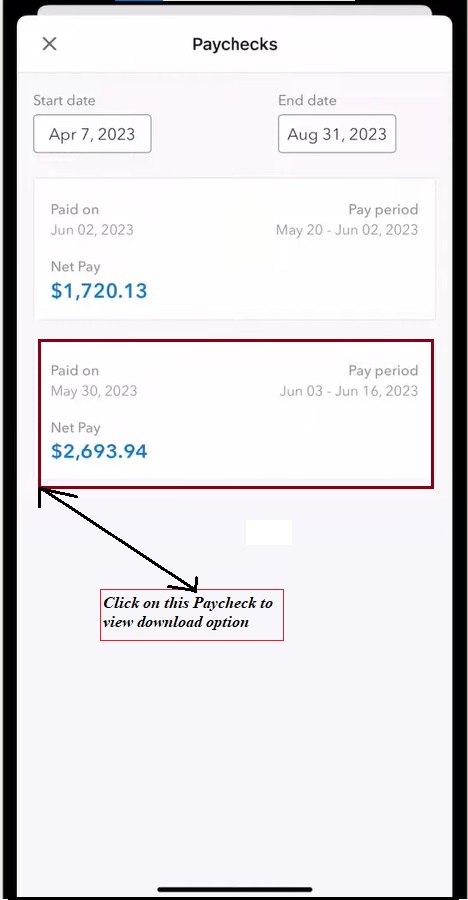
- Easy pay W-2 and 1099 forms along with easy options for employees to view their paychecks online.
- Easy automation of work: Through this application, you can easily check and approve the employees’ working hours and process their payroll within 5 minutes or less.
- Easy options are available for the employees to view their pay stubs, W-2 forms, and PTO balances.
- Another major amenity of the Online payroll of QuickBooks is the easy generation of payroll reports.
- Payroll setup through Quickbooks is far easier than any other payroll system available in the market. Also, experts are available 24/7 to make this easy for you.
- Along with all the features and benefits of this application, the QuickBooks offers the cheapest payroll services available.
In a NutShell
The QuickBooks Online Payroll Management System offers various features to easily set up this Operation Smoothly for the employees. Along with that, based on your preferences, you can easily set up QuickBooks payroll. Now this application can automatically run your payroll and calculate and pay taxes. Not only that, for the elite member, QuickBooks offers to pay reimbursement (up to 25000 USD) if the user faces any tax penalty from the error made while using QuickBooks Payroll. You can connect with experts for easy payroll setup. Also, you can connect with us for any issues you are facing with this application.
Frequently Ask Questions (FAQs)
Can I do my Own Payroll in QuickBooks?
The QuickBooks Payroll Management System provides the option to automatically approve and run their payroll. Along with that user can also manually run their payroll, for which they need to calculate taxes and file them all by themselves.
What are the three benefits of using QuickBooks Online Payroll Premium?
The premium version of the QuickBooks provides various features which are not available in the basic core payroll system:
- Tax protection program.
- 24/7 Expert Support
- Time Tracking of employees using QuickBooks Time.
What is the difference between ADP and Quickbooks Enhanced Payroll?
Both the payroll management system, the ADP and QuickBooks Payroll, are the top-notch accounting solutions available for small-scale and medium business enterprises. Each accounting software has unique features that other lacks. Based on their preferences, users can pick either of the applications through which they can fulfill the maximum of their requirements in one place.
What is the Fee for using QuickBooks Payroll Online?
The monthly charges for using QuickBooks Online Payroll go from USD 35 to USD 100. Various versions available for QuickBooks are Payroll Core, Payroll Premium, and Payroll Elite.
What are the Merits and Demerits of QuickBooks Online and Desktop?
Both the variation of QuickBooks Online and Desktop have their own advantages and disadvantages over the other. QuickBooks online easy accessibility, automatic updates, multi-user access, and many other features, which make it a perfect choice for any small-scale enterprise. The Desktop version of QuickBooks is a better preference for those who want an easy customization option and does need advanced requirement for their own.