Best Strategies to Delete QuickBooks Audit Trail Effortlessly
An audit trail is a record with the help of which the businesses can get all the details regarding the project details, transactions, and user activity. Similarly, QuickBooks also provides its users with the Audit trial feature that lets them monitor all the accounting transactions. Moreover, the QuickBooks Audit Trail is a log comprising all the changes you have made to the transactions in the software.
However, the audit log in QuickBooks Online is used to trace the person who has changed certain transactions. Go through the following post attentively for more details about the Audit trial and audit log in QuickBooks.
Want to gather more details regarding the QuickBooks Audit trial and need instant help? Contact our professionals at +1(866)408-0544 and get all your issues resolved without any further delays.
What Do You Understand By Audit Trial in QuickBooks?
The QuickBooks application provides the Audit Trial feature, which allows businesses to maintain all the trade details or other financial transactions. Moreover, using this feature, the users can easily monitor any lost transaction or the transactions that are deleted or modified. The best thing about this feature is that it acts as a life savior for you by providing you with the previous transaction, which you won’t longer access in your account.
What is the Significance of an Audit Trial In QuickBooks?
Below, we have discussed all the benefits you can access using the Audit Trial in QuickBooks.
- It helps the users to locate deleted or lost transactions.
- Another advantage is that the business owners can gather all the information regarding the task performed. Along with this, they can also monitor who is working on that particular book of accounts.
- With the help of this feature, you can easily monitor the user’s login details and activities performed.
- You may also trace the past account names united with the latest accounts.
Stepwise Instructions to Run QuickBooks Audit Trail Report
Below are some simple instructions to run the QuickBooks Audit Trail Report.
- Begin the process by clicking the Edit menu and the Preferences option.
- After this, you will see the “Preferences” dialogue box on your computer screen.
- In the same window, the users can make the mandatory changes below the Accounting Preference section.
- Thereon, choose the icon bar and hit the Accounting set of Preferences option.
- In the next step, navigate to the Company Preferences tab and tap the QuickBooks option to use the Audit feature.
- Afterwards, you must verify the audit trail and hit the Yes button.
- Ultimately, QuickBooks will begin keeping a record of the users who want to edit the QuickBooks data file.
Step-By-Step Instructions To Delete Audit Log in QuickBooks Online
The steps are to remove the audit log in the QuickBooks Online application.
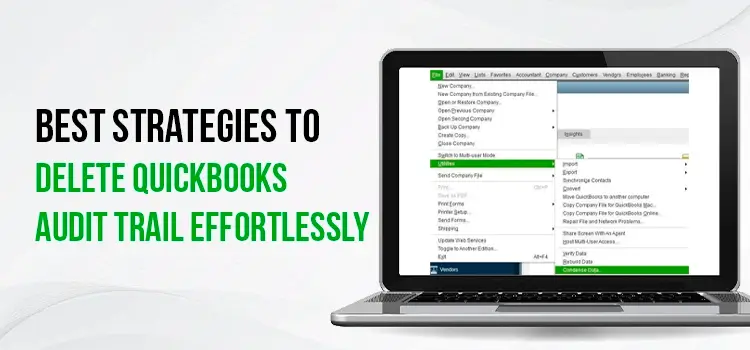
- To delete the audit log, click the QuickBooks File menu and search for ways to condense the data.
- After this, navigate to File path > Utility Tab > Condensed Data File.
- Thereon, if you pick the Audit Trial option, you can access the data file across different systems.
- On the other side, if you wish to remove the Audit Trial, first, you need to condense the files on the system where you have stored your original data.
- Consequently, you will receive the window with the pop-up message “What entry do you want to condense?.”
- Now, you will be provided with certain options like the Date that you can utilize to remove or condense transactions. You may also use it for compressing all the transactions.
- Once you make all the changes as per your preference, hit the Next button.
- End the process by choosing the “Delete Audit Trial Files” button from the new window.
Remove the Audit Trail in QuickBooks Desktop
Are you looking for the proper steps to remove the entire audit trail in QuickBooks Desktop? Go through the steps given and remove the same with little effort.
- In the first place, open the QuickBooks application and hover your cursor over the File menu.
- After this, navigate to the Utilities option and the Condense Data option.
- From the “Condense your Company File” window, select the open circle behind the “Remove the transactions you select from your company file. Choose the transactions you want to remove” option. Later on, tap the Next button to proceed further.
- You are supposed to mark the checkbox next to “Transactions outside of a date range (to prepare a period copy of company file).”
- Now, pick the appropriate Date Range and tap the Next button.
- Thereon, from the upcoming screen, select the checkbox next to “Create one summary journal entry (recommended). Replace all transactions before {Date Range Selected} with a single journal entry.”
- Next, you must act according to the rest of the window displayed on your screen and pick the best option for your business.
- End the process by hitting the option stating “Begin Condense.”
How to View the Transaction Changes in Audit History Using Audit Trail Feature?
The Audit Trail in QuickBooks keeps a track record of all changes made to certain QuickBooks files or transactions. Following is the information that is included in the Audit trail;
- It comprises the details of the user who has made the necessary modifications to your data files.
- Moreover, it also includes the Date or Time when the user has made the changes.
- Above all, it also consists of the content and type of modifications the user does to your data file.
Below are the instructions that will help you view the transaction changes in Audit History.
- Primarily, you must launch the transaction you wish to view and then hit the More tab.
- After this, choose the Audit History tab to launch the Audit Trail on your device.
- In the next step, hover your cursor over the Show All for an expanded view option.
- At last, navigate to the Compare tab to obtain the side-by-side comparison.
Simple Procedure To Restore the Deleted Transactions on QuickBooks Via Audit Trail Feature
QuickBooks allows its users to recover transactions that have been deleted accidentally through the QuickBooks Audit Trail feature. Herein, the user must remember that if their data is lost due to some technical snags, you can’t recover it using this feature. In such a scenario, you can only recover it through the backup file.
Furthermore, read the instructions stated below to restore the deleted transaction.
- To recover the lost transaction, go to the QuickBooks Menu bar and hit the Reports button.
- After this, scroll down to get the Accountants and Taxes option and tap on it. With this, you will notice that it will open up the menu on the side of the window.
- Thereon, go to the Audit Trails tab and include the date range within which the transactions are removed. For this, you must go to the From and To tabs and pick the date according to the date week or month of deletion.
- In the next step, hit the Refresh to View All the Audit Trails within the specified date range.
- Consequently, you will get the list of transactions on your computer screen. Scroll to the following list and double-tap the deleted transaction from the available options. Herein, you are supposed to write down all the information regarding the deleted transactions in a safe place.
- Lastly, you can restore the deleted transactions’ details, which will automatically restore the deleted items.
Final Observation!!
Through this post help, we hope the readers have gained all the information regarding the QuickBooks Audit Trail and QuickBooks Audit log. However, if you still need help implementing the above steps, get help from our QuickBooks professionals. They will guide you in the best possible manner. You can reach our QuickBooks professionals by dropping the mail or sending a message through the live chat.
Frequently Ask Questions (FAQs)
What is the procedure to disable the Audit Trail feature in QuickBooks?
You must follow the detailed steps to turn off the Audit Trail feature in QuickBooks.
- Begin teh process by launching the QuickBooks Desktop application.
- After this, go to the File menu, then Utilities, followed by Options.
- Now, you must choose the Range of Date and select all the relevant boxes.
- End the process by starting the cleanup process.
What do companies do to handle the Audit Trail?
The Audit trail comprises all the useful details regarding your accounting transactions. Some investors or lenders require the audited financial statement to know the company’s performance. Thus, users can reduce the cost of audits by accessing the QuickBooks audit trail feature.
Is viewing the QuickBooks Online audit trail for specific transactions feasible?
Yes, you can view the audit trail for a specific transaction by opening the transaction and then clicking on the History button.
What can I do to ensure the accuracy of the audit trail report in QuickBooks?
You can ensure the accuracy of the audit trail by reviewing it regularly and giving strong internal controls to avoid unauthorized changes.
Does the deletion of Audit Trail hamper the QuickBooks application?
No, deleting the audit trail doesn’t hamper the QuickBooks application. Moreover, the deletion of the audit trail enables the users to handle the data files, resulting in the smooth functioning of the QuickBooks software.

Recent Posts
QuickBooks Payroll: Service, Setup, Pricing and Support Guide
Read MoreQuickBooks Error Support: Get Instant Help Via Live Chat or Call
Read MoreQuickBooks Error 3371 Explained: Common Causes and 7 Effective Fixes
Read MoreHow to Contact QuickBooks Customer Service and Talk to a Live Expert
Read MoreHow to Update QuickBooks Company File Without Losing Data?
Read More