Proven Fixes For QuickBooks Internet Connection Error Read Error
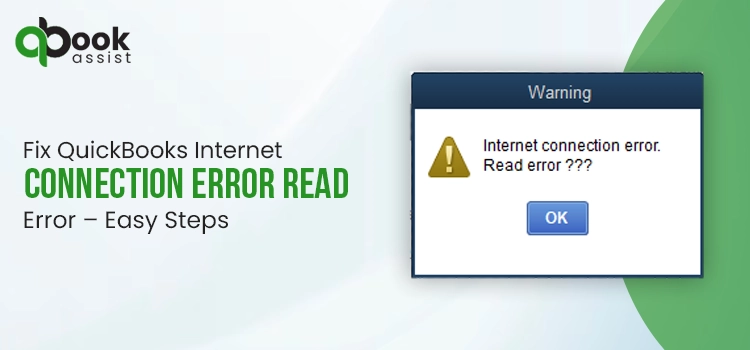
Usually, the users might discover QuickBooks internet connection error read error while trying to add employee direct deposit information. This issue might takes place when either you are using the expired QuickBooks payroll subscription or your tax table is not updated to the latest version.
Unfortunately, this issue might prevent the users from processing their employee’s paychecks on time, which might intervene in completing payroll-related tasks. Therefore, it is necessary to fix the issue using the solutions explained ahead in this post.
| Are you finding it difficult to troubleshoot QuickBooks internet connection error read error and need immediate help? Directly connect us at +1(866)408-0544 and let our QB professionals help you resolve the issue in the best possible manner. |
What Are the Possible Factors Causing Internet Connection Error QuickBooks Desktop?
The users might end up with Internet connection error QuickBooks Desktop at the time of running the payroll. Besides this, there are multiple other factors that might be responsible for the error.
- There might be the possibility that the QuickBooks Payroll subscription you are using is either expired or inactive.
- Moreover, this issue may occur if the date and time on your system isn’t set accurately.
- Sometimes, it may occur when you are accessing the QuickBooks Desktop’s security certificate which is not in use anymore.
- The browsing cache and cookies stored in your web browser might slow down the performance of the QuickBooks application.
- Windows Firewall or the third-party security application prevents users from accessing the internet connection.
- There might be difficulty in verifying the authenticity of the service keys, or subscriptions, which might hamper the payroll updates.
Reliable Ways to Eliminate QuickBooks Payroll Internet Connection Error Read Error Smoothly
Are you stuck with the QuickBooks Payroll Internet connection error read error while adding the employee direct deposit information? If yes, then you mustn’t worry anymore and use the troubleshooting methods illustrated below to resolve the issue.
Solution 1: Identify the Tax Table Version You Are Using & Update It to the Latest Version
At times, the users might end up with internet connection read error QuickBooks while working on the obsolete version of the tax table. So, it is necessary to verify whether you are using the updated version of the tax table and if not then update them to the latest version using the steps given below.
Steps to Identify the Tax Table Version You Are Using
- In the first place, the users must look at the number which is present beside the “You are using tax table version.”
- Afterwards, to ensure that you are working on the right version, you must thoroughly review the latest payroll news and updates.
- However, to get more information regarding the tax table version you are using, hit the Payroll Update Info tab.
Afterwards, for getting the latest tax table update download in QuickBooks, you must perform the steps instructed below.
- Primarily, the users must choose the Download Entire Update option.
- Right after this, hit the Update tab and it will eventually emerge the window on the screen once the downloading part is over.
Read More- Update QuickBooks Desktop to the Latest Version Easily
Solution 2: Modify the Internet Connection Settings in QuickBooks Desktop
Another troubleshooting method to resolve the QuickBooks Desktop Payroll internet connection error read error is changing the settings of the internet connection. To do so, you must closely implement the instructions given below.
- Begin the process by launching the QuickBooks Desktop application and then choosing the Help menu.
- Afterwards, you must opt for the Internet Connection Setup tab followed by the Use my computer’s internet connection settings.
- Next, choose the Advanced Connection Settings tab. As a result, you will discover that the Internet Options window will appear on the screen wherein you can make the required settings according to your preference.
Solution 3: Revalidation of QuickBooks Payroll Subscription
It is necessary for the users to assure that the QuickBooks Payroll subscription you are presently using is up-to-date. Otherwise, an invalid or expired payroll subscription might create discrepancies in the functioning of the payroll processes smoothly. Follow the instructions given below to ensure that the payroll subscription you are currently working on is valid.
- Under this process, what you require is to move to the Employees tab and then hit the My Payroll Service from its expanded menu list.
- Following this, choose the Account/Billing Info menu to proceed ahead with the process.
- Afterwards, the users must login into the Intuit account using the correct sign-in details. With this, it will eventually open up the QuickBooks Account Page on your computer screen.
- Next, you must look beneath the Status section and go with the Resubscribe option.
- Once done, start reviewing the instructions given on the screen for the successful reactivation of the payroll service.
Solution 4: Manually Adding of the QuickBooks Desktop Security Certificate
Learn More- QuickBooks Payroll Update Not Working? Here’s How to Fix It
Phase 1: Start Searching For the Company File
- Under this process, the users must right-click on the QuickBooks icon from the desktop and then hit the Properties tab.
- After this, by accessing the shortcut key, you must choose the Open File Location option followed by OK.
- For the users of the QuickBooks Pro/Premier or Accountant include the following path : “C: >> Program Files (X86) >> Intuit >> QuickBooks 20XX.”
- On the other end for the Enterprise or Enterprise Accountant users, include the path as follows: “C: >> Program Files (X86) >> Intuit >> QuickBooks Enterprise Solutions XX.0
Phase 2: Start Installing the Security Certificate
- First of all, from the location window the users must start looking for the Application file which is shown as “.exe” file. When you get it, right-click on the file and opt for the Properties option from the drop-down menu list.
- As a result, it will immediately open up the Application File Properties window.
- Thereon, the users must hit the Digital Signatures tab and then pick any one of the entries listed in the Signatures list field. Later on, move ahead by tapping on the Details tab.
- Now, you will reach the Digital Signature Details window from where you must choose the Install Certificate option.
- When you arrives the Certificate Import Wizard welcome screen, verify that the Store Location is set at Current User.
- While you access the Certificate Store window, you will notice that the Windows will automatically choose the certificate store based on the type of certificate. When you are all set, tap the Next option followed by Finish.
- Finally, you will discover that the import successful screen will be presented on the screen and then hit the OK tab.
Solution 5: Review the Date And Time On our System
Sometimes, the users might encounter difficulty in processing the payroll and other important operations if the date and time on the system is not configured properly. So, it’s important to verify that the date and time of the system is accurate by using the steps listed below.
- Firstly, you must verify the date and time by tapping on the bottom right corner of the screen and ensuring it is accurate.
- If the time isn’t correct, then move to the Windows Start menu and then choose the Settings option.
- From the upcoming screen, you must opt for the Time & Language option followed by the Date & Time.
- After this, set the date and time according to the region and country you are presently staying.
- When you are done making the mandatory changes, hit the OK tab and it will eventually update your time and date to reflect your local time.
- Furthermore, you must select Change Time Zone and verify that you have chosen the right time zone.
Solution 6: Begin Setting Up the Firewall Settings Accurately
The Windows Firewall act as a security wall which prevents the users from running the programs smoothly on your computer. Therefore, to resolve the issue, it is necessary to set up the firewall settings using the steps below.
- Under this process, the users are first required to click on the Start menu and move to the Control Panel.
- When you reach the Control Panel window, move to the System and Security, followed by the Advanced Settings.
- Soon after this, opt for the Inbound Rules > New Rule > Programs and then the Next tab.
- Afterwards, you must the “This Program Path” option and move to the location that carries your data file.
- Now, tap on the Allow the Connection tab and verify that all the checkboxes is chosen.
- Finally, you must mention the name of the latest firewall rule and verify whether the issue exists.
Solution 7: Include Intuit As the Trusted Website in Your Web Browser
The users must perform the following instructions to list Intuit as the trusted website in their web browser.
- In the first place, you must move to the Settings and More option, followed by the Settings tab.
- Afterwards, the users must choose the Cookies and Site Permissions option. Then, click the Manage and Delete Cookies and Site Data option.
- Move to the Allow section to proceed further with the process.
- Thereon, you must click the Add option and insert Intuit.com. Then, you must tap on the Add option to save the Intuit website for saving it as a trusted website.
Solution 8: Flushing Off the DNS Settings
Removing the DNS will help you delete the IP address and the DNS entries which might configure the internet connection issues. Therefore, to remove the DNS, implement the stepwise instructions given below.
- In the first place, use the Windows + R keys to bring up the Run command window and include “CMD” in the search console.
- As a result, it will redirect you to the Command Prompt window and insert “ipconfig/flushdns” and hit the Enter key. With this, it will instantly remove the issues and help you resolve the QuickBooks internet connection error read error.
Solution 9: Remove the Unnecessary Cookies and Cache Files From Your Internet Browser
By removing the cookies and cache files from your internet browser will help you deal with the QuickBooks internet connection error read error. For that, all you require is to perform the stepwise instructions described below.
- In the initial stage, the users must launch Internet Explorer and move to the Tools icon.
- Afterwards, jump to the Internet Options from the menu and choose the Internet Options.
- Now, what you require is to choose the General tab and from the Browsing History, pick up the Delete option.
- After this, what you need is to pick the following options to remove from the records:
- Cookies and website data
- History
- Passwords
- Temporary Internet Files and website files
- When you are done implementing the above steps, hit the Delete tab and shut down the Internet Options window.
- Later on, close the Internet Explorer window and then try to access the internet option to see if the issue still persists.
Drawing to a Conclusion!!
With the help of this comprehensive post, we hope that you can easily deal with the QuickBooks internet connection error read error. If you are still facing issues while connecting with QuickBooks on the internet, then feel free to connect with our QB professionals at +1(866)408-0544 for immediate help.

Recent Posts
How to Get QuickBooks Training For Both Online & Desktop Versions?
Read MoreHow to Setup QuickBooks For Multiple Businesses? An Easy Guide
Read MoreHow to Reconcile in QuickBooks Online Without Mistakes? Easy Guide
Read MoreQuickBooks Error 15225 — The Complete Fix Guide for Payroll and Desktop Update Failures
Read MoreQuickBooks Error 1402 — The Complete 12-Step Fix Guide for Windows 10 and Windows 11
Read More