QuickBooks Error 1402 — The Complete 12-Step Fix Guide for Windows 10 and Windows 11
You were not doing anything risky.
You clicked the update button — the same one you have clicked a dozen times before — and walked away for ten minutes. When you came back, QuickBooks was gone. Not slow. Not glitchy. Gone. Replaced by a message that makes absolutely no sense to someone who runs a business and not an IT department:
“Error 1402: Could not open key. Verify that you have sufficient access to that key, or contact your support personnel.”
Registry key. Access denied. Contact support personnel.
Meanwhile, your team cannot log in. Your accountant is waiting on last quarter’s numbers. Payroll runs tomorrow. And you have no idea what any of that error message actually means.
This is the reality of QuickBooks Error 1402 — and it happens because a routine software update collided with a Windows permission setting in a way that nobody warned you about. It is not your fault. And it is not permanent.
At QBookAssist, we fix this error for business owners and accountants across the US every single week. We have seen it on clean new Windows 11 machines and decade-old Windows 10 workhorses. We have seen it appear after Windows updates, after antivirus installations, after QuickBooks updates, and after absolutely nothing at all changed that anyone could identify.
This guide contains every fix we know — twelve of them, in the exact order we recommend — along with two tables that will save you from trying solutions that do not apply to your situation. Start here. Work through it. You will get your QuickBooks back.
Which Solution Is Right for Your Specific Situation?
Do not start at Solution 1 and blindly work through every step. Use this table first — it will get you to the right fix faster.
| Your Exact Situation | Start Here |
| Error appeared during a QuickBooks update | Solution 1 — Tool Hub |
| Windows has not been updated in months | Solution 2 — Windows Update |
| Error appeared immediately after a Windows upgrade | Solution 4 — %temp% Folder |
| You are on Windows 11 specifically | Solution 9 — UAC Fix |
| Antivirus was recently installed or updated | Solution 7 — Selective Startup |
| QuickBooks was recently uninstalled and reinstalled | Solution 12 — Clean Reinstall |
| Error shows a specific registry key path in message | Solution 11 — Error Log |
| All solutions tried and error is still there | Call QBookAssist |
How Long Will This Actually Take?
Before you start — here is an honest time estimate for every solution. No surprises.
| Solution | Time Required | Difficulty Level |
| Solution 1 — Tool Hub Diagnostic | 20 minutes | ⭐ Easy |
| Solution 2 — Windows Update | 15–30 minutes | ⭐ Easy |
| Solution 3 — reboot.bat File | 2 minutes | ⭐ Easy |
| Solution 4 — %temp% Folder Fix | 3 minutes | ⭐ Easy |
| Solution 5 — Compatibility Troubleshooter | 5 minutes | ⭐ Easy |
| Solution 6 — Registry Permissions | 10 minutes | ⭐⭐ Medium |
| Solution 7 — Selective Startup | 20 minutes | ⭐⭐ Medium |
| Solution 8 — Repair .NET and MSXML | 30 minutes | ⭐⭐ Medium |
| Solution 9 — Windows 11 UAC Fix | 10 minutes | ⭐ Easy |
| Solution 10 — System File Checker | 15 minutes | ⭐ Easy |
| Solution 11 — Error Log Review | 10 minutes | ⭐⭐ Medium |
| Solution 12 — Clean Reinstall | 60–90 minutes | ⭐⭐⭐ Hard |
Most people are back in QuickBooks within 30 minutes using Solutions 1 through 5. The later solutions exist for cases where something deeper is broken. Work through them in order and stop the moment the error is gone.
What QuickBooks Error 1402 Actually Means
Plain English version — no IT degree required.
When QuickBooks installs or updates, it needs to write information into a part of Windows called the registry. Think of the registry as a giant organized filing cabinet that Windows uses to keep track of every program on your computer. QuickBooks needs to open a specific drawer, make some notes, and close it.
Error 1402 means the drawer is locked.
Maybe the lock is broken, another program changed the combination, or Windows quietly reset the permission settings after an update without telling anyone. Whatever the reason — QuickBooks cannot get into that drawer and it cannot complete what it started.
Here is what matters most: your company file data is almost certainly fine. Error 1402 is an installation conflict. Your financial records, your invoices, your payroll history — they are sitting safe on your hard drive right now. You just cannot reach them until QuickBooks is working again. That is a solvable problem.
What Actually Causes QuickBooks Error 1402?
Five causes account for essentially every case we have ever handled.
Cause 1 — Windows Registry Permissions Were Damaged or Reset
This is the cause behind the majority of Error 1402 cases we see at QBookAssist. Windows registry permissions can get damaged after a Windows update that quietly resets certain access settings, after a previous QuickBooks uninstall that did not clean up properly, or after security software decided to tighten registry access as a protective measure — without notifying you.
When the permissions are wrong, QuickBooks hits a locked door during installation and cannot proceed past it.
Cause 2 — Microsoft’s Supporting Components Are Broken
QuickBooks is not self-contained. It depends on three Microsoft components to function — .NET Framework, MSXML, and Visual C++ libraries. When any of these are damaged, outdated, or partially installed, the QuickBooks installer cannot complete its work even if everything else is perfectly configured.
We see this most often after major Windows upgrades. A Windows 10 to Windows 11 upgrade in particular sometimes leaves these components in a half-working state that breaks QuickBooks installation with no obvious warning sign.
Cause 3 — Windows Is Behind on Updates
This one surprises people. An outdated Windows system — even just a few months behind — creates compatibility gaps that QuickBooks installation trips over. Microsoft ships registry and permission fixes as part of regular updates. If those patches are not on your system, QuickBooks hits the unfixed problem and cannot proceed.
Cause 4 — Antivirus or Security Software Blocked the Installation
Antivirus programs — Norton, McAfee, Avast, Windows Defender, and others — sometimes flag QuickBooks installer activity as suspicious and block it quietly in the background. The installation appears to run. It gets partway through. Then it silently stops because the security software cut off registry access.
The result is a partially installed QuickBooks that is broken enough to show Error 1402 but intact enough that it still appears in your Programs list — which is why a simple reinstall attempt often fails.
Cause 5 — The Installation File Itself Is Corrupted
A download that got interrupted, an update that stopped mid-process, or an installation that was forced closed — all of these leave broken fragments in the registry. The next installation attempt finds those broken pieces and cannot work around them.
Other Errors That Appear Alongside QuickBooks Error 1402
This section alone separates this guide from everything else you will find online. Error 1402 rarely travels alone in serious cases — and the combination of errors you are seeing tells a specific story about what needs to be fixed.
QuickBooks Error 6150
After a failed QuickBooks installation triggered by Error 1402, some users try to open their company file directly and immediately get QuickBooks Error 6150. This is not a separate problem — it is the same problem expressing itself differently. The installation that was supposed to support your company file never completed. Fix the 1402 and Error 6150 disappears with it in most cases.
C=44 QuickBooks Error
The C=44 QuickBooks error is an internal code that appears when a data file operation fails during a damaged installation state. Seeing C=44 alongside Error 1402 tells us immediately that the installation disruption went deeper than a simple permission conflict. Standard solutions may not be enough — that combination is a call-us situation, not a keep-trying-alone situation.
QuickBooks Hosting Mode Is Off
After you fix Error 1402 and reinstall QuickBooks, your hosting settings often reset completely. Your server is no longer sharing the company file with other workstations. Everyone on your team gets an access error and assumes something new broke — when really it is just a setting that got wiped during the reinstall.
If QuickBooks hosting mode is off after resolving Error 1402, go to File > Utilities > Host Multi-User Access on your server computer and re-enable it. Then restart the QuickBooks Database Server Manager. Network access restores immediately.
QuickBooks Driver Lacks Full Font Support
This message looks alarming and means very little. QuickBooks driver lacks full font support appears when certain QuickBooks display components were not installed correctly during a partial installation. It is a cosmetic side effect of the same incomplete installation that caused Error 1402. Fix the installation — it disappears.
QuickBooks File Doctor Check Your Network Greyed Out
A lot of people try to run File Doctor when QuickBooks stops working — which makes complete sense. But if QuickBooks File Doctor check your network is greyed out, it is because File Doctor’s network diagnostic tools require a functioning QuickBooks installation to operate. Error 1402 leaves the installation in a broken state that disables that button entirely.
Fix the installation first. Run File Doctor afterward. The button will be fully active again. If it is still greyed out after a complete clean reinstall — that is a separate network configuration issue that needs direct support.
12 Solutions — How to Fix QuickBooks Error 1402
One thing before you start. If you can open QuickBooks at all — even briefly — back up your company file right now. Go to File > Back Up Company > Create Local Backup. Thirty seconds of backup work now protects everything.
If QuickBooks will not open at all, your data is still safe on the hard drive. Just work through the solutions below.
Solution 1 — Run the QuickBooks Install Diagnostic Tool
Close QuickBooks completely. Go to Intuit’s official website and download the latest version of the QuickBooks Tool Hub. Open the downloaded file and follow the on-screen steps to install it. Agree to the terms and conditions when prompted.
Once installed, open the QuickBooks Tool Hub — if you cannot find the icon, press the Windows key, type QuickBooks Tool Hub, and select it from the results. Go to the Installation Issues tab. Click QuickBooks Install Diagnostic Tool and let it run.
Do not interrupt it. It can take up to twenty minutes and it is supposed to take that long. When it finishes, restart your computer completely. Then try opening QuickBooks or running the update again.
This single tool fixes the majority of Error 1402 cases we encounter. It automatically detects and repairs damaged .NET Framework, MSXML, and C++ components — the root cause behind most installation failures. If it works, you are done. If it does not fully resolve the error, move to Solution 2.
From our team: We run the Tool Hub on every single Error 1402 case before doing anything else — even when the client describes a situation that sounds like it definitely needs a registry fix. About 55% of the time, the Tool Hub handles it completely and we never need to go further.
Solution 2 — Update Windows Completely
Do not skip this. It feels unrelated. It is not.
Click the Windows Start button and type Settings. Go to Update and Security > Windows Update on Windows 10, or Windows Update directly on Windows 11. Click Check for Updates. Install every update available — including the optional ones that do not install automatically. Restart when prompted.
This resolves QuickBooks Error 1402 on Windows 11 in a significant number of cases. Windows 11 security updates frequently include registry permission patches that directly impact how third-party installers operate. A system that is even a few months behind on updates may be missing the specific fix that allows QuickBooks to complete its installation.
After the restart, attempt the QuickBooks installation or update again before moving forward.
Solution 3 — Run the reboot.bat File
This is one of the fastest fixes available and most people have never heard of it.
Open File Explorer and navigate to C:\ProgramData\Common Files\Intuit\QuickBooks. Look for a file called reboot.bat. Right-click it and select Run as Administrator. A command window opens briefly and runs. Wait for it to finish completely — it usually takes under sixty seconds.
What this does is re-register all of QuickBooks’ registry entries in Windows from scratch. It is essentially telling Windows — here is QuickBooks, here are all its registry entries, please recognize them as valid. After it finishes, try updating QuickBooks Desktop and test whether the error is gone.
If you cannot find the reboot.bat file at that path, the installation is damaged enough that this file was not created properly.
Solution 4 — Fix the %temp% Folder Permissions
This fix is almost never mentioned anywhere else — and it resolves Error 1402 in cases where nothing obvious seems wrong with the registry or Windows components.
Press Windows + R and type %temp% in the Run box. Press Enter. A folder opens — this is the temporary folder that Windows and QuickBooks use during installation.
Right-click anywhere inside that folder and select Properties. Go to the Security tab and click Edit. Find your Windows username in the list. Under the Allow column, check the Full Control checkbox. Click OK to apply.
When the %temp% folder has restricted permissions — which happens silently after certain Windows updates without any warning — the QuickBooks installer cannot write the temporary files it needs during installation. Granting Full Control to your user account removes that restriction.
After making this change, try the QuickBooks installation or update again immediately.
Solution 5 — Run the Windows Compatibility Troubleshooter
Almost no other guide covers this fix — which is precisely why it helps users who have already tried everything else.
Navigate to the folder where your QuickBooks installer file is saved — usually your Downloads folder or Desktop. Right-click the QuickBooks installer file — not the shortcut, the actual installer — and select Properties. Go to the Compatibility tab. Click Run Compatibility Troubleshooter.
Windows will analyze the installer and automatically recommend the correct compatibility settings for your system version. Click Try Recommended Settings and attempt the installation again with those settings applied.
This works particularly well on Windows 11 systems where the QuickBooks installer was built for an earlier Windows version and Windows 11’s compatibility layer is quietly blocking certain installation operations as a protective measure. The troubleshooter identifies and resolves that conflict automatically.
From our team: We started recommending this fix about eighteen months ago after noticing a pattern — clients on fresh Windows 11 machines who had tried the Tool Hub and Windows Update with no result often got through the installation immediately after running the compatibility troubleshooter. It is now standard in our Windows 11 Error 1402 process.
Solution 6 — Fix Windows Registry Permissions Manually
Follow this exactly. Do not deviate. And do the backup first — it takes thirty seconds and gives you a complete safety net.
Press Windows + R, type regedit, and press Enter. The Registry Editor opens. Before touching anything, click File > Export, name the backup file something memorable, and save it to your Desktop. Done — you now have a full registry backup you can restore from if anything goes wrong.
Navigate to HKEY_LOCAL_MACHINE\SOFTWARE\Classes in the left panel. Click Edit > Permissions. In the window that appears, click Advanced, then Add. Type Everyone in the object name field and click OK. Check the Full Control box. Click Apply and OK to save.
Now exit the Registry Editor and restart your computer. Try the QuickBooks installation again.
If the error message you received showed a specific registry key path — it usually looks something like HKEY_LOCAL_MACHINE\SOFTWARE\Microsoft\Windows\CurrentVersion\Installer — navigate to that exact path in the Registry Editor and repeat the same permissions process for that specific key as well.
Honestly: We know the registry sounds scary. But if you follow these steps exactly — backup first, navigate carefully, apply Full Control, restart — there is very little that can go wrong. The backup means you can always undo everything. Take it one step at a time.
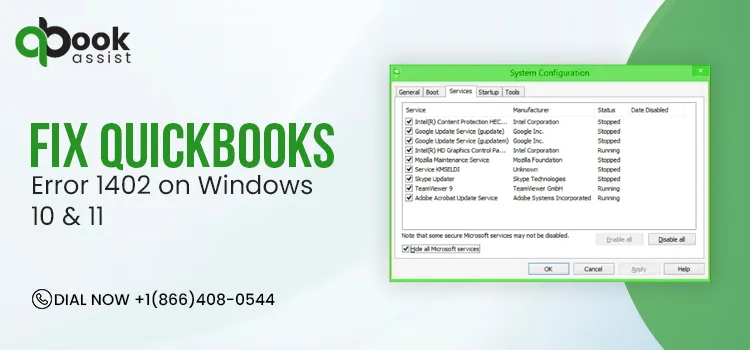
Solution 7 — Install QuickBooks in Selective Startup Mode
When background software is blocking the installation without telling you, Selective Startup removes all interference.
Press Windows + R, type MSConfig, and click OK. Under the General tab, select Selective Startup and confirm Load System Services is checked. Go to the Services tab. Check Hide all Microsoft Services, then click Disable All. Now uncheck Hide all Microsoft Services and scroll through the list to find Windows Installer — make sure it is checked. Click Apply and restart.
With everything except core Windows services turned off, try your QuickBooks installation or update. Nothing in the background can interfere with it now — no antivirus scanning, no update services, no third-party applications running quietly.
After the installation completes, go back to MSConfig, select Normal Startup, and restart again to restore your regular settings. Never leave the system in Selective Startup permanently.
Solution 8 — Repair Microsoft .NET Framework and MSXML
If the Install Diagnostic Tool from Solution 1 did not automatically repair these components, do it manually.
For .NET Framework: Go to Control Panel > Programs and Features > Turn Windows Features On or Off. Find .NET Framework in the list. If it is unchecked, enable it. If it is checked but damaged — uncheck it, click OK, restart your computer, then re-enable it and let Windows repair it automatically on the next startup.
For MSXML: Press the Windows Start button and in the search bar type:
exe /fvaum “%userprofile%\desktop\msxml.msi”
Press Enter. If MSXML is damaged, this command initiates the repair. Alternatively, download the MSXML package directly from Microsoft’s official website, save it to your Desktop, and run the installer manually.
After repairing both components, run the QuickBooks Install Diagnostic Tool from Solution 1 one more time to confirm everything registered correctly before attempting the installation again.
Solution 9 — Windows 11 Specific UAC Fix
This solution is specifically for QuickBooks Error 1402 on Windows 11 — and it addresses something unique to how Windows 11 handles installer permissions that does not apply to Windows 10.
Windows 11 has stricter default User Account Control policies than any previous Windows version. Even when you are logged in as an Administrator, Windows 11 does not automatically grant elevated permissions to third-party installers unless they explicitly request them. QuickBooks does not always do this correctly — and Error 1402 appears as a result.
Fix step 1: Find your QuickBooks installer file. Right-click it and select Run as Administrator — do not just double-click. This explicitly tells Windows 11 to grant the installer the elevated permissions it needs.
Fix step 2: Go to Control Panel > User Accounts > Change User Account Control Settings. You will see a slider with four levels. Temporarily slide it down one level from its current position. Click OK and restart. Run the QuickBooks installation. After it completes successfully, return UAC to your original setting.
These two adjustments specifically address the permission model that Windows 11 applies to third-party installers — and they resolve QuickBooks Error 1402 on Windows 11 in the majority of cases where Solutions 1 through 8 were not enough.
Solution 10 — Run Windows System File Checker
This tool is built into Windows and almost nobody uses it until something breaks. It should be used proactively — but it also fixes Error 1402 in cases where damaged Windows system files are quietly corrupting registry access permissions.
Press the Windows key, type cmd, right-click Command Prompt in the results, and select Run as Administrator. In the command window, type:
sfc /scannow
Press Enter. Windows will scan every protected system file on your computer and automatically repair any that are damaged or replaced by incorrect versions. This takes ten to fifteen minutes. Do not close the window while it runs — let it complete entirely.
When it finishes, restart your computer and attempt the QuickBooks installation again.
Why this works for Error 1402: damaged Windows system files silently corrupt registry access permissions over time — without any obvious warning. System File Checker finds and repairs these before they block another installation.
Solution 11 — Read the QuickBooks Installation Error Log
This is the most precise fix on the entire list — and it is in every other guide’s blind spot.
Instead of applying broad permission changes across the registry and hoping one of them covers the problem, this solution finds the exact registry key that QuickBooks could not access and fixes only that.
Press Windows + R and type %appdata%\Intuit\QuickBooks in the Run box. Press Enter. A folder opens. Look for a file called QBInstall.log or similar — it will have a recent date matching when the error occurred. Open it with Notepad.
Press Ctrl+F and search for 1402 or Error. The log will show the exact registry key path that QuickBooks could not open — something like:
HKEY_LOCAL_MACHINE\SOFTWARE\Microsoft\Windows\CurrentVersion\Installer\UserData
Copy that exact path. Open the Registry Editor (Windows + R, type regedit). Navigate to that precise location using the left panel. Right-click the folder at that path and select Permissions. Grant Full Control to your Administrator account. Close the Registry Editor and restart.
This targeted fix resolves the exact problem without touching anything else — and it works in cases where the broader Solution 6 registry fix did not reach the specific key that was causing the issue.
From our team: When clients have been through Solutions 1 through 10 with no resolution, this is the first thing we check. The error log almost always contains the exact registry path that everything else missed. It is the most underused diagnostic tool for this error by far.
Solution 12 — Clean Reinstall of QuickBooks Desktop
If you have worked through Solutions 1 through 11 and the error is still there — this is the definitive fix. And the most important thing about it is doing it correctly. A reinstall done wrong simply recreates the same problem.
Step 1 — Uninstall QuickBooks completely. Go to Control Panel > Programs and Features. Find QuickBooks in the list. Click Uninstall. Let it complete fully and restart your computer when it is done.
Step 2 — Run the QuickBooks Clean Install Tool. This is the step that most failed reinstalls skip — and it is why they fail. Open the QuickBooks Tool Hub, go to Installation Issues, and run the Clean Install Tool. This removes every residual QuickBooks file, folder, and registry entry that the standard uninstall left behind.
Do not reinstall QuickBooks until this tool has finished. Reinstalling over broken remnants just recreates the same error.
Step 3 — Download a fresh installer. Go to Intuit’s official website and download the latest QuickBooks Desktop installer directly. Do not use a saved installer from months ago — download a fresh copy.
Step 4 — Install as Administrator. Right-click the installer and select Run as Administrator. Follow the on-screen steps. Activate QuickBooks using your original license key.
Step 5 — Verify your company file. Open QuickBooks and your company file. Confirm everything looks correct before returning to normal work.
This resolves Error 1402 in every case where the earlier solutions could not — because it removes everything broken and replaces it with a completely fresh installation.
Run the QuickBooks Connection Diagnostic After Fixing
Once QuickBooks is opening correctly, do not jump straight back into work. Take five minutes here first.
Open the QuickBooks Tool Hub and go to Network Issues. Run the QuickBooks Database Server Manager and scan your company file folder. This confirms that your network connections, firewall rules, and file permissions all survived the installation repair intact.
If you were previously seeing QuickBooks File Doctor check your network greyed out — try it again now. With a complete installation restored, that button will be fully active. Run the network check and confirm your connections are healthy before opening your company file for the day.
Also verify your hosting settings. Go to File > Utilities on your server computer. It should show Stop Hosting Multi-User Access — meaning it is actively hosting the file. If it shows Host Multi-User Access instead, click it to enable hosting and restart the Database Server Manager. Your team’s network access returns immediately.
How to Make Sure QuickBooks Error 1402 Never Comes Back
Fifteen minutes of prevention right now versus another Error 1402 in six months. Here is what actually makes a difference.
Always right-click QuickBooks and select Run as Administrator when applying updates. Make this a habit. This single action eliminates the permission conflict that starts the entire problem — because it explicitly grants the installer the elevated access it needs instead of relying on Windows to figure it out automatically.
Keep Windows updated automatically. The registry permission fixes that prevent Error 1402 come through Windows updates. A system behind on updates is a system waiting for this error to happen again. Turn on automatic updates and let them run.
Add QuickBooks to your antivirus whitelist. Open your antivirus or security software and mark QuickBooks Desktop as a trusted application. This prevents future installation interference without reducing your overall security in any meaningful way.
Run System File Checker every three months. Open Command Prompt as Administrator and run sfc /scannow quarterly. This catches damaged Windows system files before they become QuickBooks problems. It takes fifteen minutes and works quietly in the background.
Create a Windows System Restore point before every major QuickBooks update. Search for Create a Restore Point in the Windows Start menu. Click Create and name it something like Before QuickBooks Update May 2025. If anything goes wrong during a future update, you have a complete fallback that takes your entire system back to a working state.
When to Stop and Call a Specialist
We believe in giving business owners every tool to fix things themselves. But there are specific situations where continuing to troubleshoot alone is not the right call — and being honest about that matters more than making this guide seem like it solves everything.
Stop and call a certified QuickBooks specialist if you have worked through all twelve solutions and the error is still appearing. That combination tells us something environment-specific is happening — an enterprise group policy, a managed security configuration, or a deeper installation conflict that requires someone to look at your actual system.
Call immediately if you are seeing Error 1402 alongside C=44 or the QuickBooks Unrecoverable Error at the same time. That combination signals a data integrity issue that needs professional assessment before any further troubleshooting.
Call before touching anything if you completed the reinstall, QuickBooks opens, but your company file will not open — or your reports are showing wrong balances or missing transactions. Do not start manually correcting things. Let us verify the file is fully intact first. Corrections made to a damaged file before it is repaired often make things worse.
And call if your business has enterprise IT management, group policies, or domain-level security controls. Registry permission changes in those environments sometimes require domain administrator access that goes beyond what a local account can do — no matter how carefully you follow the steps above.
Call QBookAssist at [+1-866-408-0544] — we resolve QuickBooks Error 1402 on Windows 10 and Windows 11 systems every day and we will get you back into your company file the same day.
Conclusion
There is nothing fair about QuickBooks Error 1402. You did what you were supposed to do — you kept your software updated — and Windows permission settings turned that into a business disruption.
But here is where we land after handling hundreds of these cases: it is almost always fixable. The twelve solutions in this guide cover every situation we have encountered — from a simple Tool Hub scan that takes twenty minutes to a targeted error log fix that goes after the exact registry key causing the problem. Work through them in the order that matches your situation, using the table at the top to find your starting point.
Most people are back in QuickBooks within thirty minutes. A few need the full clean reinstall. And a small number — the ones with C=44 errors, enterprise security environments, or post-fix data concerns — need a specialist.
Frequently Asked Questions (FAQs)
Q1: What is QuickBooks Error 1402 and is my data safe?
QuickBooks Error 1402 is a Windows registry permission error that appears during installation or updates. It means QuickBooks could not access a specific registry key it needed to complete the process. Your company file data is almost always unaffected — this error disrupts the installation, not your financial records. Your data sits safe on your hard drive until the installation is repaired.
Q2: What is the fastest fix for QuickBooks Error 1402?
Start with the reboot.bat file in Solution 3 — it takes under two minutes and re-registers all of QuickBooks’ registry entries automatically. If that does not work, the %temp% folder fix in Solution 4 takes three minutes and resolves a surprising number of cases. If you want the most comprehensive automated fix, the Tool Hub Install Diagnostic Tool in Solution 1 handles the majority of cases but takes up to twenty minutes to run.
Q3: Why did my QuickBooks reinstall not fix Error 1402?
Almost certainly because you reinstalled over a broken installation without running the Clean Install Tool first. The standard uninstall leaves residual registry entries and files behind — reinstalling over them recreates the same problem. The solution is to uninstall QuickBooks, run the QuickBooks Clean Install Tool from the Tool Hub, restart, and then install a fresh downloaded copy. That sequence resolves virtually every failed reinstall situation.
Q4: Is QuickBooks Error 1402 different on Windows 11 than Windows 10?
The root cause is the same on both — registry permission conflicts and damaged Windows components. But Windows 11 has stricter User Account Control policies that cause this error to appear more frequently during routine updates, even on otherwise healthy systems. The specific Windows 11 fix involves running the installer explicitly as Administrator and temporarily lowering the UAC setting during installation — both covered in Solution 9.
Q5: Why is my QuickBooks File Doctor network button greyed out after Error 1402?
File Doctor’s network diagnostic requires a functioning QuickBooks installation to operate. Error 1402 leaves the installation in a broken state that disables the network check button. Fix the installation using any of the twelve solutions, then return to File Doctor — the button will be fully active. If it remains greyed out after a complete clean reinstall, that indicates a network configuration issue separate from Error 1402 that needs direct support.
Q6: What should I do if QuickBooks hosting mode turned off after I fixed Error 1402?
This is completely normal after a reinstall — hosting settings reset to factory defaults. On your server computer, open QuickBooks, go to File > Utilities, and click Host Multi-User Access to re-enable hosting. Then open the QuickBooks Database Server Manager from the Tool Hub and scan your company file folder. Your team’s network access restores within minutes. It is a two-minute fix, not a new problem.
Q7: Can QuickBooks Error 1402 come back after I fix it?
Yes — if the underlying cause was not fully addressed. The most common reasons for recurrence are antivirus software that re-blocks QuickBooks registry access after the next update, Windows updates that reset permission settings again, or a reinstall that was done without the Clean Install Tool and left broken remnants behind. Following the prevention steps — Run as Administrator habit, automatic Windows updates, QuickBooks antivirus whitelist — significantly reduces the chance of seeing this error again.
Q8: Is it safe to edit the Windows registry to fix Error 1402?
Yes — if you follow the specific steps exactly and create a registry backup before making any changes. The backup process takes thirty seconds and gives you a complete restore point if anything goes wrong. The registry edits required for Error 1402 are limited to changing permission settings on specific keys — they do not delete or modify any data. If you are not comfortable doing it yourself, our team at QBookAssist can handle the registry fix remotely and safely.

Recent Posts
QuickBooks Payroll: Service, Setup, Pricing and Support Guide
Read MoreQuickBooks Error Support: Get Instant Help Via Live Chat or Call
Read MoreQuickBooks Error 3371 Explained: Common Causes and 7 Effective Fixes
Read MoreHow to Contact QuickBooks Customer Service and Talk to a Live Expert
Read MoreHow to Update QuickBooks Company File Without Losing Data?
Read More