Fix QuickBooks Error 15276 When Updating QB Desktop
Did you encounter QuickBooks error 15276 when downloading the payroll tax table or the software updates?
Failure to advance the QuickBooks version or payroll services can occur for various reasons, such as an incompatible operating system, not having the proper permissions, etc. This triggers error code 15276 and other 15XXX update errors on your screen with a warning message:
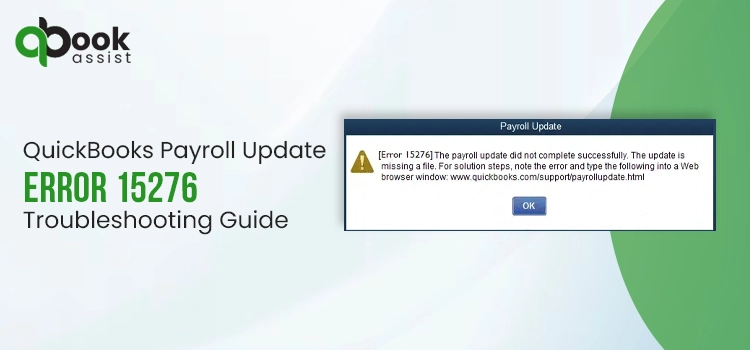
“[Error 15276] The payroll update did not complete successfully. The update is missing a file.”
Worrying about software updates is common, but you don’t need to. This blog discusses the possible 15XXX you may encounter, triggering factors, and the best ways to rectify the error to ensure you receive the security updates.
QuickBooks Update Error 15276: An Overview
Software updates are often interrupted due to various reasons, causing different errors to appear on your screen. Similarly, you may get different QuickBooks 15XXX series errors when failing to receive updates. Let’s explore the possible error codes you may encounter except error code 15276:
| QuickBooks error 15102 | QuickBooks error 15103 | QuickBooks error 15104 |
| QuickBooks error 15105 | QuickBooks error 15106 | QuickBooks error 15107 |
| QuickBooks error 15212 | QuickBooks error 15215 | QuickBooks error 15222 |
| QuickBooks error 15223 | QuickBooks error 15240 | QuickBooks error 15241 |
| QuickBooks error 15270 | QuickBooks error 15271 |
Top Ways to Troubleshoot QuickBooks Error 15276 When Updating
Several factors may be responsible for QuickBooks error 15276 when receiving QB updates, such as missing permissions or your system’s security settings blocking software updates. In this section, we will discuss its possible causes and provide step-by-step instructions to resolve the issue.
Let’s proceed with the steps below to fix update issues:
1. Download the QuickBooks updates as an administrator
You may encounter error 15XXX due to not having sufficient permissions to make changes on your computer to download QuickBooks updates.
- Exit your company files and then QB Desktop.
- Find the QB icon and double-click on it, then select Run as Administrator.
- Click Yes on the prompt that asks, “Do you want to allow this program to make changes to your computer?“
- Once done, download the latest QB Desktop product and then get the latest payroll tax table update again.
2. Run Quick Fix my Program
The Quick Fix my Program shuts down the processes in the background lingering with the software updates and runs a quick fix to the program. Make sure to download and install QuickBooks Tool Hub to the latest release and run the tool:
- Launch the QB Tool Hub.
- Select Program Problems form the left pane.
- Click on Quick Fix my Program.
3. Install a digital signature certificate
A digital certificate is an electronic authentication of digital information such as email messages, macros, or electronic documents that pass through your software. If QB fails to verify it, you will not be able to receive updates, and other critical processes may be interrupted.
Install the digital signature certificate for QuickBooks by following the steps below:
- Locate to C:\Program Files\Intuit\QuickBooks in File Explorer.
- Find the QBW32.exe file and right-click on it.
- Choose Properties.
- Select Digital Signature and make sure Intuit is select in your signature list.
- Click on Details.
- Hit on View Certificate in the Digital Signature Details window.
- Tap on Install Certificate in the Certificate window.
- Click on Next until Finish is displayed, then select Finish.
- Now, restart your computer.
- Launch QB and try again to download the updates.
4. Repair QuickBooks Desktop
Let’s repair your QuickBooks installation to ensure you receive the latest security and feature updates:
- Double-click on the Tool Hub icon to open.
- Select Installation Issues from the left pane.
- Hit on QuickBooks Install Diagnostic Tool. The tool might take up to 20 minutes; let it run until then.
- When it finishes, restart your computer and launch QuickBooks Desktop and then open your company file.
- Now, update your QuickBooks Desktop to the latest release. This ensures you use the most recent security patches fixes.
5. Enable the QuickBooks File Copy services
Follow the steps below to enable File Copy Service in QuickBooks, so that you don’t see QuickBooks error 15276 and receive updates seamlessly:
- Press the Windows+R keys together to launch the Run command.
- In the Run section, type COMPMGMT.MSC and click OK.
- This will open the Computer Management window.
- Now, select Services and Applications.
- Tick mark the option for Services.
- Scroll down and look for the Intuit QuickBooks FCS and make a double click on it.
- Click on Startup type and select Manual.
- Finally, select Apply and click OK.

After this is done, re-validate the payroll’s service key to refresh the connection.
Here’s how:
- Select Employees from the top menu bar.
- Click on My Payroll Service.
- Hit on Activate Service Key.
- Highlight the current payroll and select Edit under the Service Keys window.
- Choose Next until finish comes up on your screen.
6. Map the Shared Download Drive
When you map a network drive, you share access to a folder with another computer, which also means you can access a folder stored on another drive, server, or computer over the network. Mapping makes it easier to share a company file, but if it’s not mapped correctly, you may experience update problems.
Learn how to map a shared download drive in QuickBooks Desktop:
For Windows 11
- Press the Windows logo key on your keyboard.
- Enter This PC in the search bar and choose This PC from the search results.
- Click on More (…) and then select Map network drive. Note: If you don’t find Map network drive, right-click on This PC and choose Map network drive.
- Choose a drive letter in Drive.
- OR you can either: – Enter the full path of foler you are mapping or – Enter the path to the computer you are hosting your file and click on Browse to find the folder
- Click on Reconnect at sign-in to make sure the drive maps everytime when you sign in to your computer.
- Hit on Finish.
For Windows 10
- Hit the Windows icon key on your keyboard.
- Search for This PC, then choose This PC from the search results.
- Move to the Computer tab and choose Map a network drive.
- Choose any drive letter that you haven’t used and click Browse.
- Go to the network location where you save your QuickBooks company file.
(Note: Try using the server’s IP address if you have problems mapping the network drive with the UNC.) - Hit OK, then select Finish.
- Now, open your QuickBooks company file from the network drive you just mapped.
7. Configure the Windows Firewall and internet security settings
The Windows Firewall is a system security application that controls ports for the incoming and outgoing data on the ports. It may consider your QuickBooks a threat to your computer, blocking the program from running all the related operations, probably due to incorrect settings.
Let’s configure these settings by following the below steps to get your updates seamlessly:
a. Add Firewall port exception for QuickBooks
If you use multiple versions of QuickBooks Desktop, you will need to create exceptions for each versions of the program:
- Press the Windows icon key to launch the Windows Start menu.
- In the search bar, type Windows Firewall and hit Enter.
- Click on Advanced settings.
- Right-click on Indound Rules and select New Rule.
- Choose Port and hit Next.

- Make sure TCP is selected as rule type.
- Enter the ports needed for your QuickBooks version in the Specific local ports field: – QuickBooks Desktop 2020 and later: 8019, XXXXX. – QuickBooks Desktop 2019: 8019, XXXXX. – QuickBooks Desktop 2018: 8019, 56728, 55378-55382. – QuickBooks Desktop 2017: 8019, 56727, 55373-55377.
| Important: All the future versions of QuickBooks Desktop after 2019 used dynamic ports. These are specific firewall ports (not a range) assigned during installation. This ensures QuickBooks Desktop gets exclusive use of a given port. |
- Get the dynamic port number for your QB version: – Launch the Windows Start menu. – Type “QuickBooks Database Server Manager” in the search field and Enter. – Move to the Port Monitor tab. – Look for your QB version and note down the port number. You will be using the number when creating firewall exceptions.
Note: Keep in mind, you can change the assigned port number by selecting Renew. If you do, go to the Scan Folders tab and select Scan Now to reset the firewall permissions. You can only renew ports for Desktop 2019 and later versions. You can’t renew ports for older versions of QuickBooks.
- Enter your port number and select Next.
- Click on Allow the Connection and select Next.
- Once prompted, ensure all the profiles are marked and select Next.
- Create this rule and name it as “QBPorts(year).”
- Once all done, select Finish.
Repeat the same steps to create outbound rules by following all the same above steps except select Outbound Rules on step 4.
b. Create Windows firewall exceptions for QuickBooks programs
The QuickBooks program uses executable files (.exe) to perform various tasks. You will need to create exceptions for each executable on the table. Let’s see how to do that:
- Launch the Windows Start menu.
- Type Windows Firewall in the search bar and hit the Enter key.
- Click on Advanced settings.
- Right-click on the Inbound Rules and then click on New Rule.
- Choose Program and hit on Next.
- Tap on This Program Path and select Browse.
- Look for the executable files in the below table and select Next.
- Click on Allow the connection, then Next.
- When prompted, ensure all the profiles are makred and click Next.
- Finally, create this rule and name it as QBFirewallException(name.exe).
Create outbound rules by repeating the previous procedures. Proceed as before, with the exception of choosing Outbound Rules at step 4.
| Executable files | Location |
| AutoBackupExe.exe | C:\Program Files\Intuit\QUICKBOOKS YEAR |
| Dbmlsync.exe | C:\Program Files\Intuit\QUICKBOOKS YEAR |
| DBManagerExe.exe | C:\Program Files\Intuit\QUICKBOOKS YEAR |
| FileManagement.exe | C:\Program Files\Intuit\QUICKBOOKS YEAR |
| FileMovementExe.exe | C:\Program Files\Intuit\QUICKBOOKS YEAR |
| FileMovementExe.exe | C:\Program Files\Intuit\QUICKBOOKS YEAR |
| QuickBooksMessaging.exe | C:\Program Files\Intuit\QUICKBOOKS YEAR |
| QBW32.exe | C:\Program Files\Intuit\QUICKBOOKS YEAR |
| QBDBMgrN.exe | C:\Program Files\Intuit\QUICKBOOKS YEAR |
| QBServerUtilityMgr.exe | C:\Program Files\Common Files\Intuit\QuickBooks |
| QBCFMonitorService.exe | C:\Program Files\Common Files\Intuit\QuickBooks |
| QBLaunch.exe | C:\Program Files\Common Files\Intuit\QuickBooks |
| QBUpdate.exe | C:\Program Files\Common Files\Intuit\QuickBooks\QBUpdate |
| IntuitSyncManager.exe | C:\Program Files\Common Files\Intuit\Sync |
| OnlineBackup.exe | C:\Program Files\QuickBooks Online Backup |
Note: If you see Program Files as (x86), this shows you use a 64-bit Operating system.
Launch QuickBooks Desktop and try to switch to multi-user mode. If you see an error, consider creating exceptions for program files in your antivirus applications.
Ensure the general permissions to run the different operations aren’taren’t blocked in an antivirus. Check the official website of your antivirus software and allow QuickBooks to run the services.
8. Re-install QuickBooks
Consider reinstalling QuickBooks Desktop to fix problems with the program and company files. This will rename the old files and replace them with new ones. Let’s learn how to install QuickBooks Desktop:
Before you start
- Get the installer of the same version as your QuickBooks.
- Keep the license number handy, which you will find on the original packaging. Check the purchase confirmation email if you bought it online.
a. Remove QuickBooks
- Press the Windows Start menu and search for Control Panel.
- Hit the Enter key to open Control Panel.
- Click on Programs and Features or select Uninstall a Program.
- Choose your version of QuickBooks Desktop to remove from the list of programs.
- Hit on Uninstall/Change, Remove and then Next. If you can’t find the option, sign out and then sign in back to Windows as an administrator.
b. Install QB Desktop Again
- Make sure your computre is connected to an active internet connection.
- Find the QuickBooks.exe file and double-click on it.
- Select – Express install: This will install over your old version of QuickBooks and save all of your preferences. To get your old version back, you’ll have to reinstall it using custom install. – Custom and Network Options: This allows you to leave older versions installed and install the latest version somewhere else. The new version does not include your previous version choices.
- Hit on Next.
- Choose Install.
- Once all done, select Open QuickBooks.
Summary
We all know how important it is to download the QuickBooks updates for a seamless financial and accounting experience. Failure to get these updates can make the system’s security vulnerable and affect your data. It can also be responsible for inaccurate tax calculations due to outdated tax rates and more. This detailed guide covers everything about QuickBooks error 15276 and other related errors you may encounter during the updates.
In case you get stuck somewhere or find it challenging to resolve the update error, consulting QuickBooks professionals is recommended. Dial +1(866)408-0544 and talk to an expert now!
FAQ
What is error 15271 in QuickBooks payroll?
QuickBooks error 15271 is an update error that is encountered when trying to update the payroll services or the program itself. The error appears with a warning message on your screen saying, “[Error 15276] The payroll update did not complete successfully. The update is missing a file.”
How do I fix a QuickBooks update error?
Restart your computer and QuickBooks Desktop to resolve the common problems. Now, try again to download your updates as an administrator. In case this doesn’t work, make sure your operating system is up-to-date and use the Quick Fix my Program and QuickBooks Install Diagnostic tool to run a quick repair.
What is QuickBooks error code 15000?
QuickBooks error code 15000 is an update error that appears when updating payroll services and the software updates. It’s a series of errors that varies such as QuickBooks error 15276, QuickBooks error 15270, QuickBooks error 15241 and more.
What causes QuickBooks update error?
Not having the proper admin rights, an incompatible Windows operating system, or if the program files or Windows is damaged or corrupted, you may fail to download the QB updates and the latest payroll tax table. Also, failure to verify a digital signature certificate can be why you fail to download the updates.
How do I reset my QuickBooks update?
Learn how to reset your QuickBooks update:
- Go to Help at the top menu bar.
- Click on Update QuickBooks Desktop.
- Select Update Now from the window.
- Mark the checkbox for Reset Updates.
- Finally, click Update Now.

Recent Posts
QuickBooks Payroll: Service, Setup, Pricing and Support Guide
Read MoreQuickBooks Error Support: Get Instant Help Via Live Chat or Call
Read MoreQuickBooks Error 3371 Explained: Common Causes and 7 Effective Fixes
Read MoreHow to Contact QuickBooks Customer Service and Talk to a Live Expert
Read MoreHow to Update QuickBooks Company File Without Losing Data?
Read More